Experience AutoMQ Enterprise Edition on EKS at zero cost.
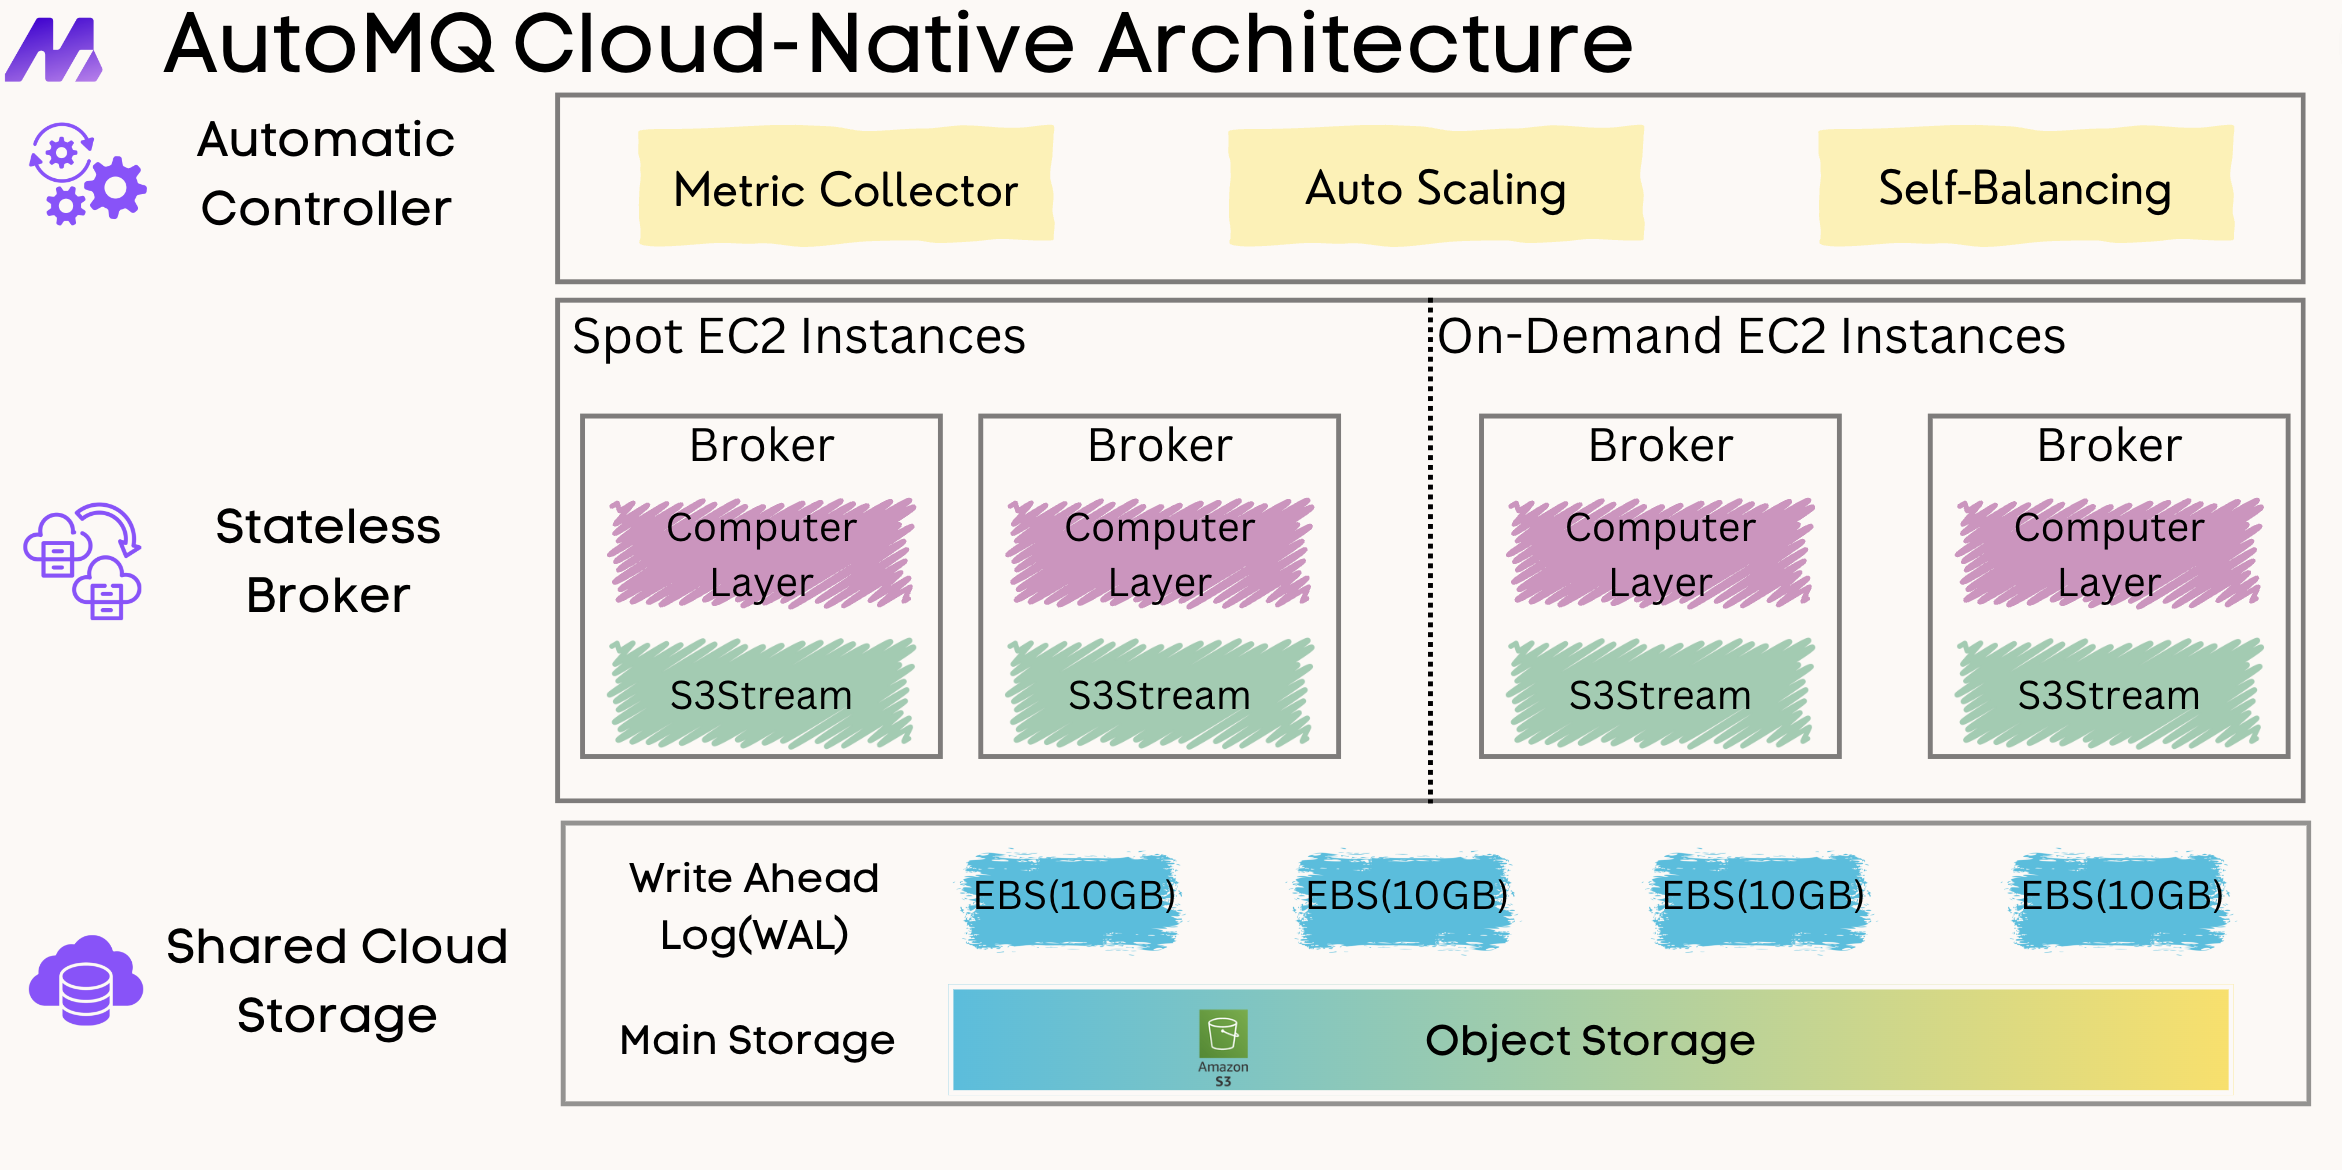
AutoMQ is a Kafka alternative product designed with a cloud-first concept. AutoMQ innovatively redesigns the storage layer of Apache Kafka based on the cloud, and on the basis of 100% compatibility with Kafka, separating persistence to EBS and S3 brings 10x cost reduction and 100x elasticity enhancement, and has better performance than Apache Kafka.
In order to allow developers and friends interested in AutoMQ to better experience the capabilities of AutoMQ Enterprise Edition kernel, AutoMQ has partnered with AWS to provide everyone with a free trial of AutoMQ. No need for users to provide any cloud resources or pay any fees, truly **completely free ** . This article will introduce how to fully deploy an AutoMQ cluster on EKS in a few minutes.
Fill in the trial form on the AutoMQ official website, and mark "zero-cost trial" in the business scenario and scale column. We will contact you within 30 minutes during working days and send you a dedicated free trial access link and the Helm Chart of AutoMQ Enterprise Edition trial. Then you can log in to the free trial platform as follows to get a free 3-day trial qualification.
-
Terraform v1.3+
-
AWS CLI v2.7.0/v1.24.0 +, reference installed and configured
-
kubectl v1.24.0+
-
AutoMQ Enterprise Edition Helm Chart
-
Only regions with Amazon Managed Service for Prometheus on AWS are supported.
-
An AutoMQ cluster with 3 Controllers (hybrid nodes) and 1 Broker node will be deployed. The configuration of each broker is 2c16g.
-
Cluster SASL_PLAIN authentication enabled by default
-
The default WAL engine used by the cluster is S3WAL. You can refer to the official documentation for different WAL Storage implementations of AutoMQ.
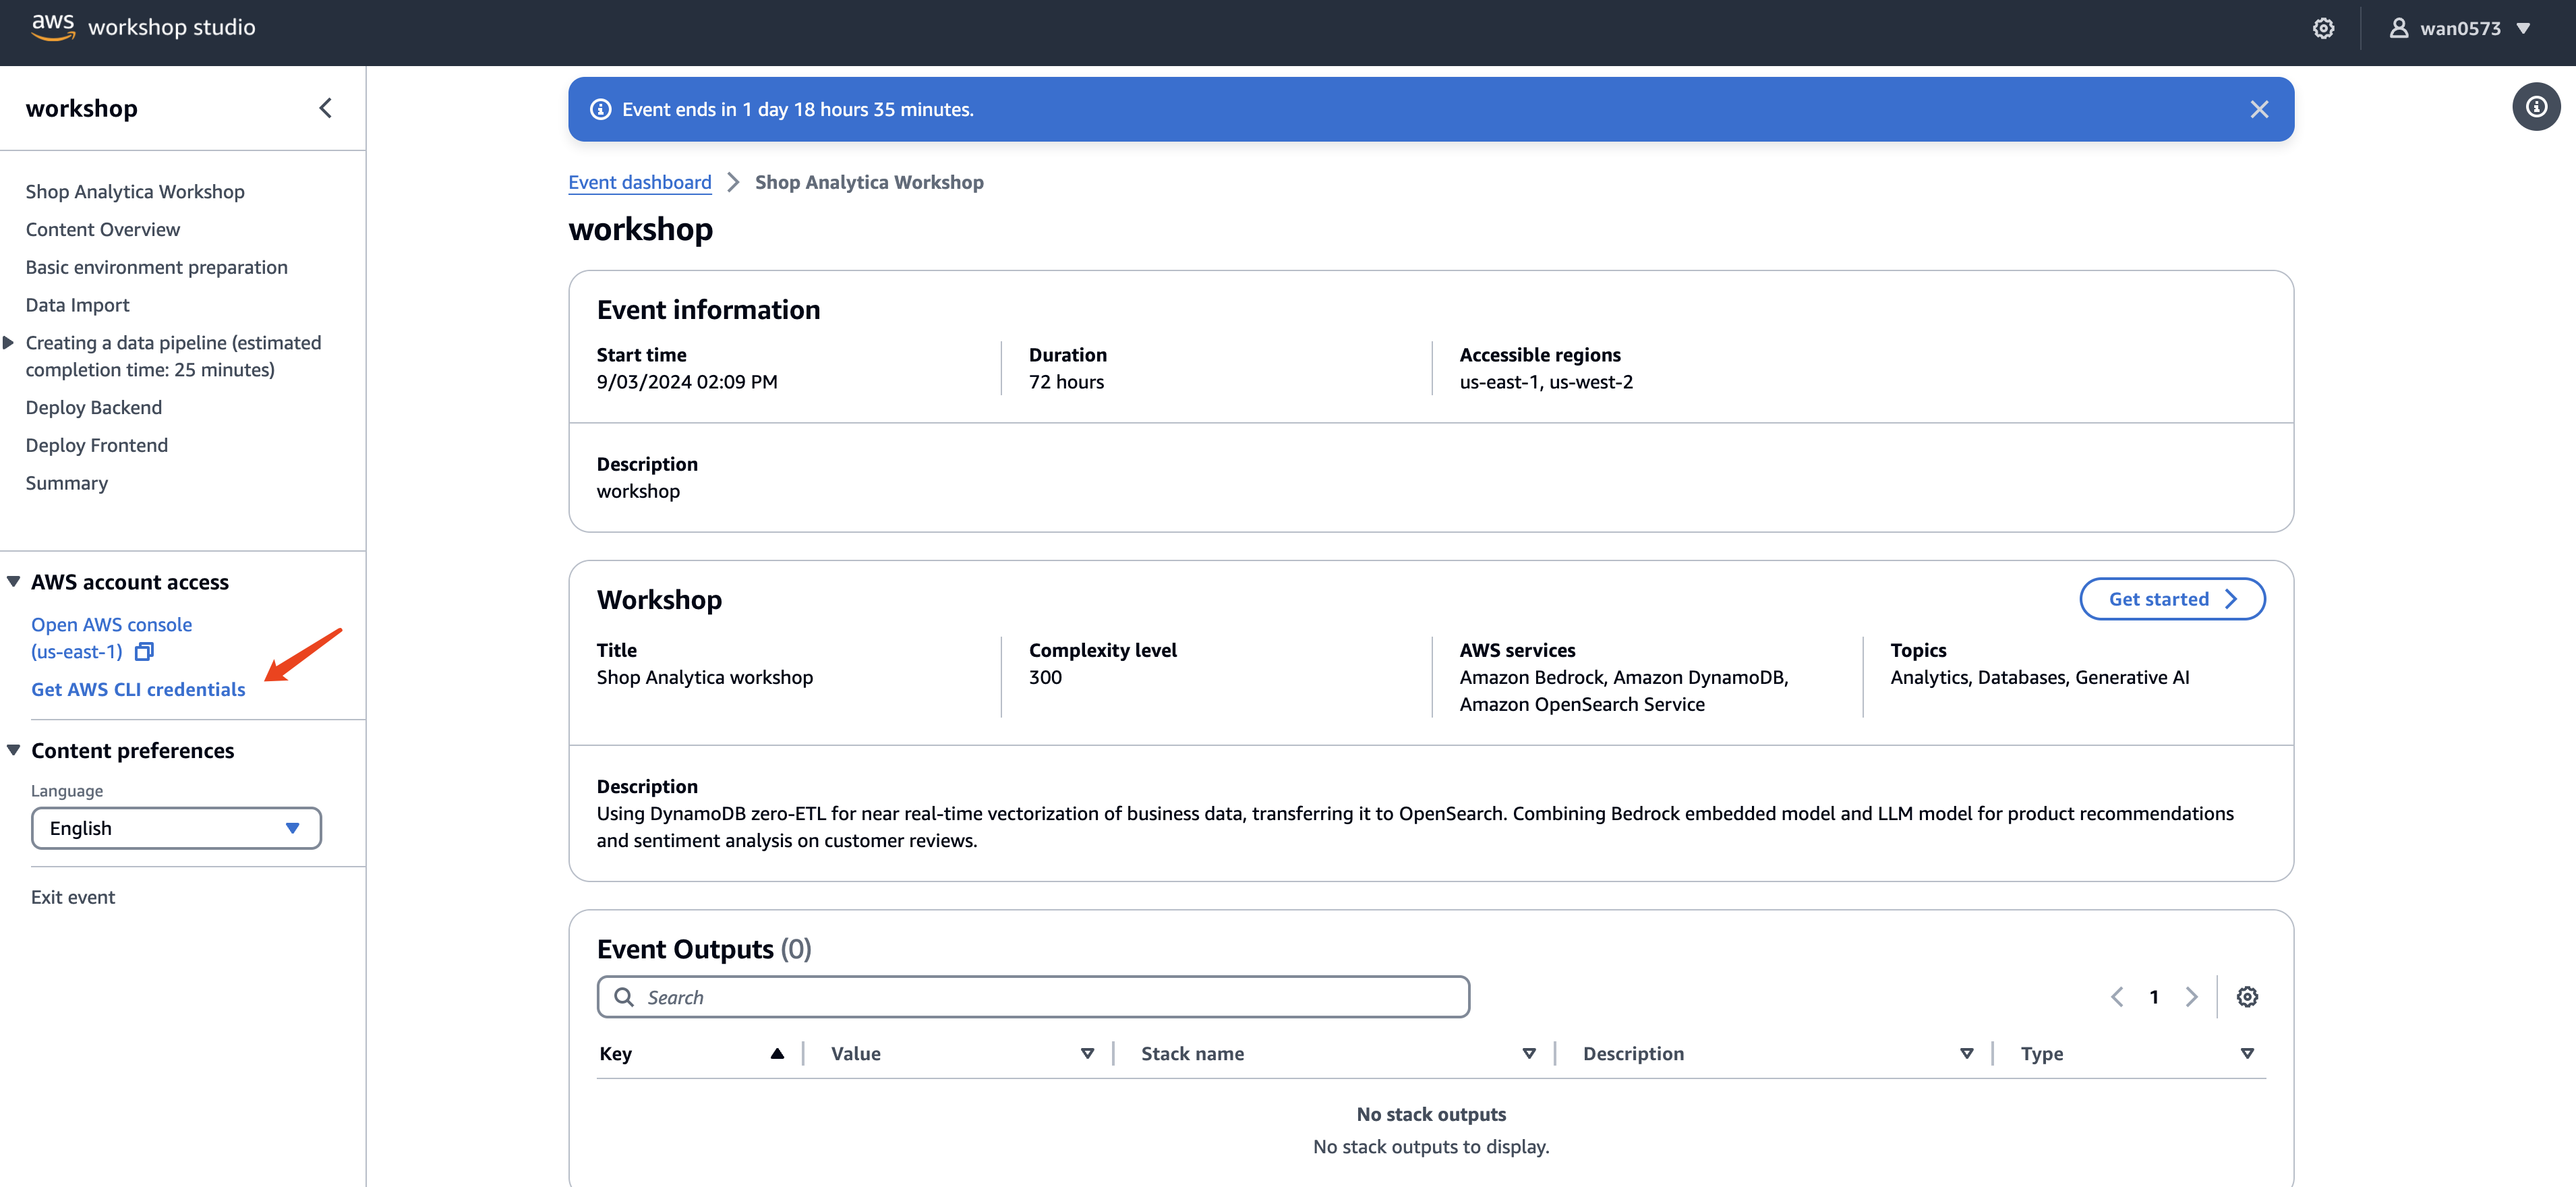
Obtain identity credentials from the Console after logging in to the Workshop.
Copy the corresponding execution commands according to different environments and export environment variables. This tutorial takes macOS system as an example.
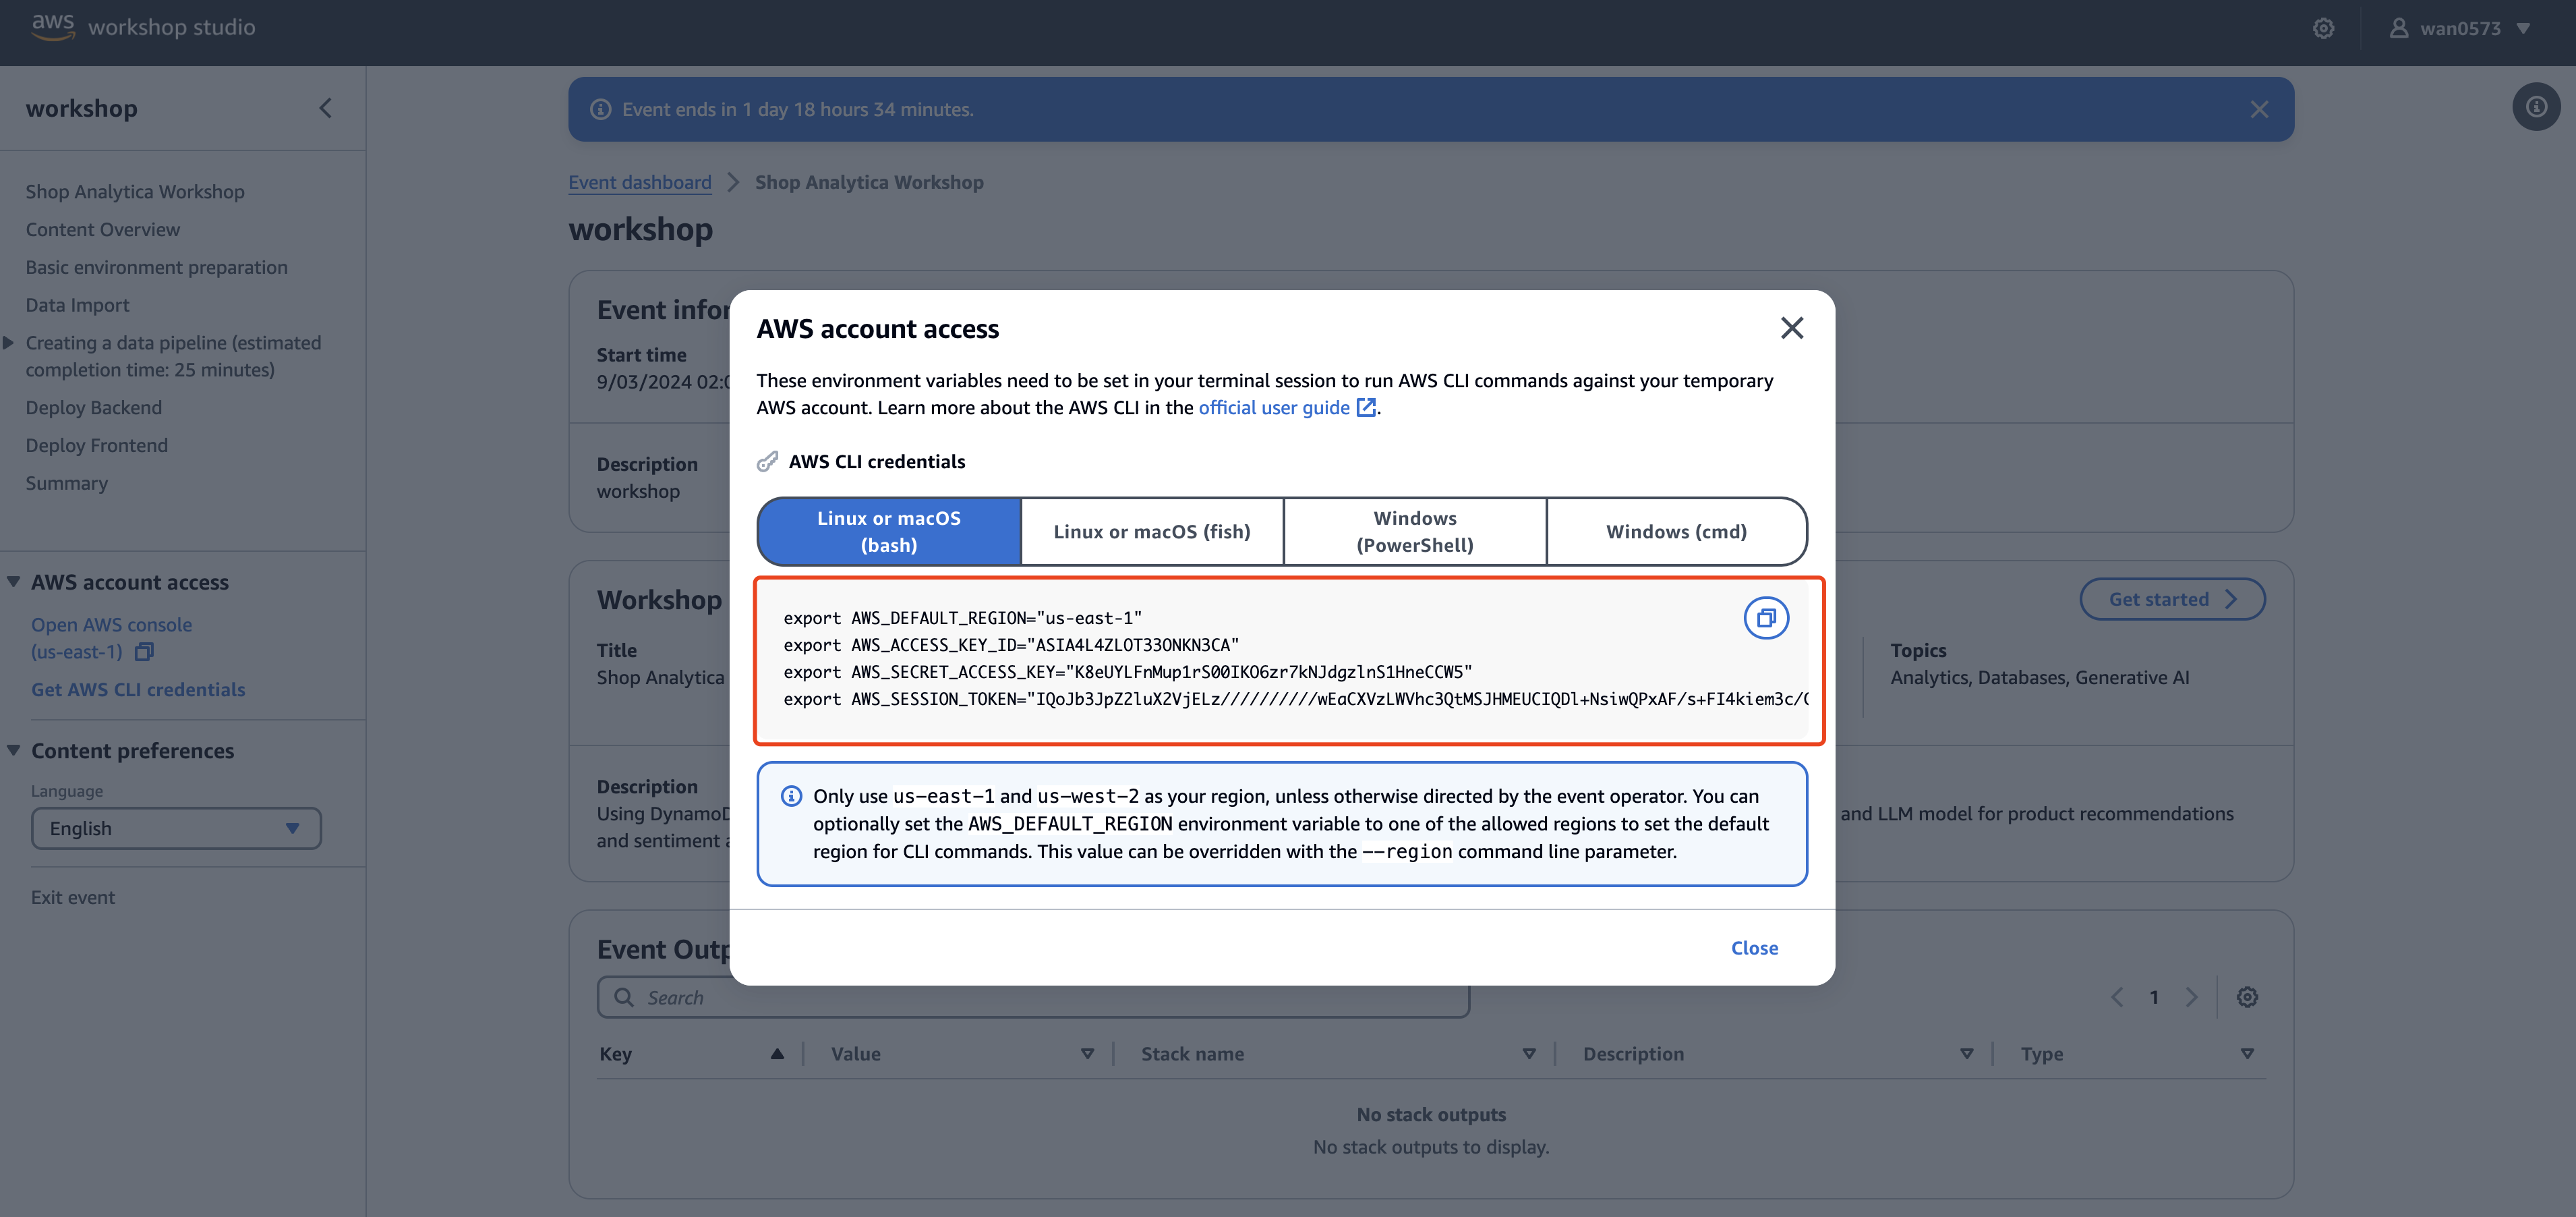
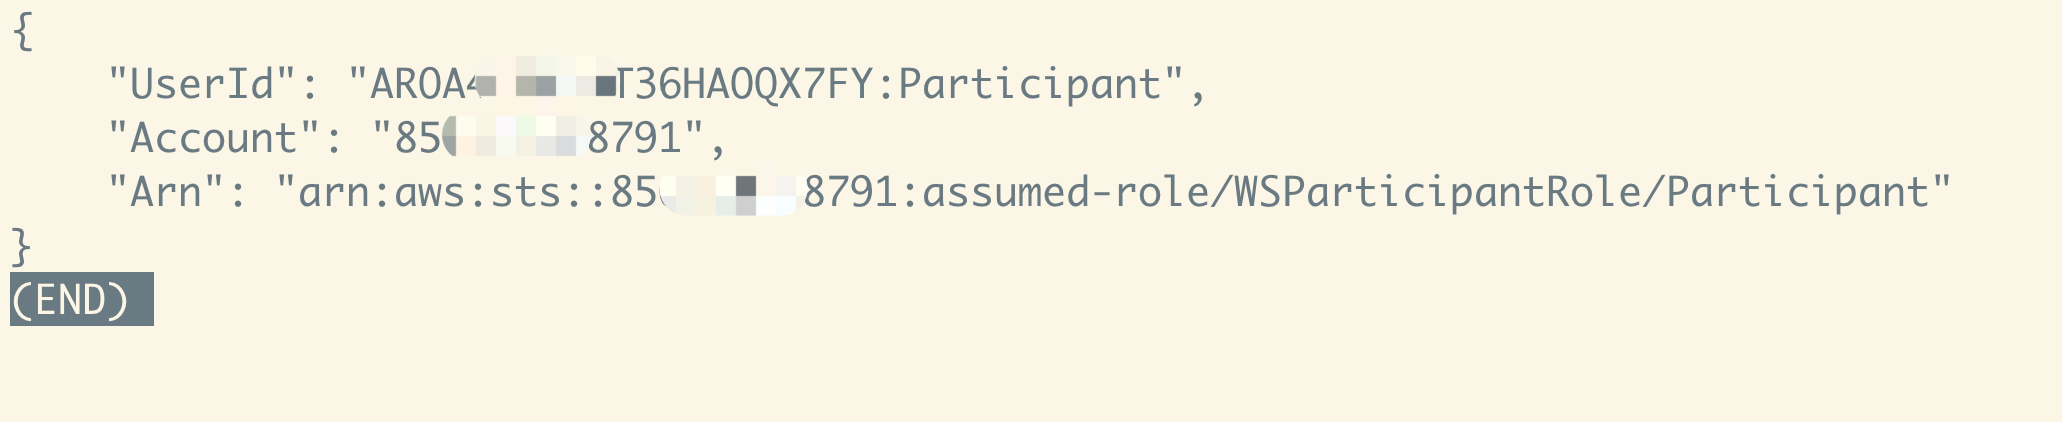
After exporting environment variables locally, you can confirm whether the identity credentials are valid by using the following command:
aws sts get-caller-identity
We have prepared a Terraform configuration file that can be used directly by default for you. Clone the automq-eks-example project and execute the command in it to start deployment
git clone /~https://github.com/AutoMQ/automq-eks-example
cd automq-eks-example
terraform init
terraform apply
After terraform apply is executed, it can automatically create resources such as EKS clusters, VPC networks, and object storage buckets.

Make sure that the AWS authentication information has been configured correctly. In the execution directory of Terraform, execute the following command to synchronize kubeconfig. After synchronization is complete, you can use the kubectl command to access the EKS cluster.
aws eks --region $(terraform output -raw region) update-kubeconfig \
    --name $(terraform output -raw cluster_name)

First, install the Storage Class that AutoMQ depends on. The Storage Class file can be obtained from the automq-eks-example project mentioned earlier. Execute the following command:
kubectl apply -f storageclass.yaml
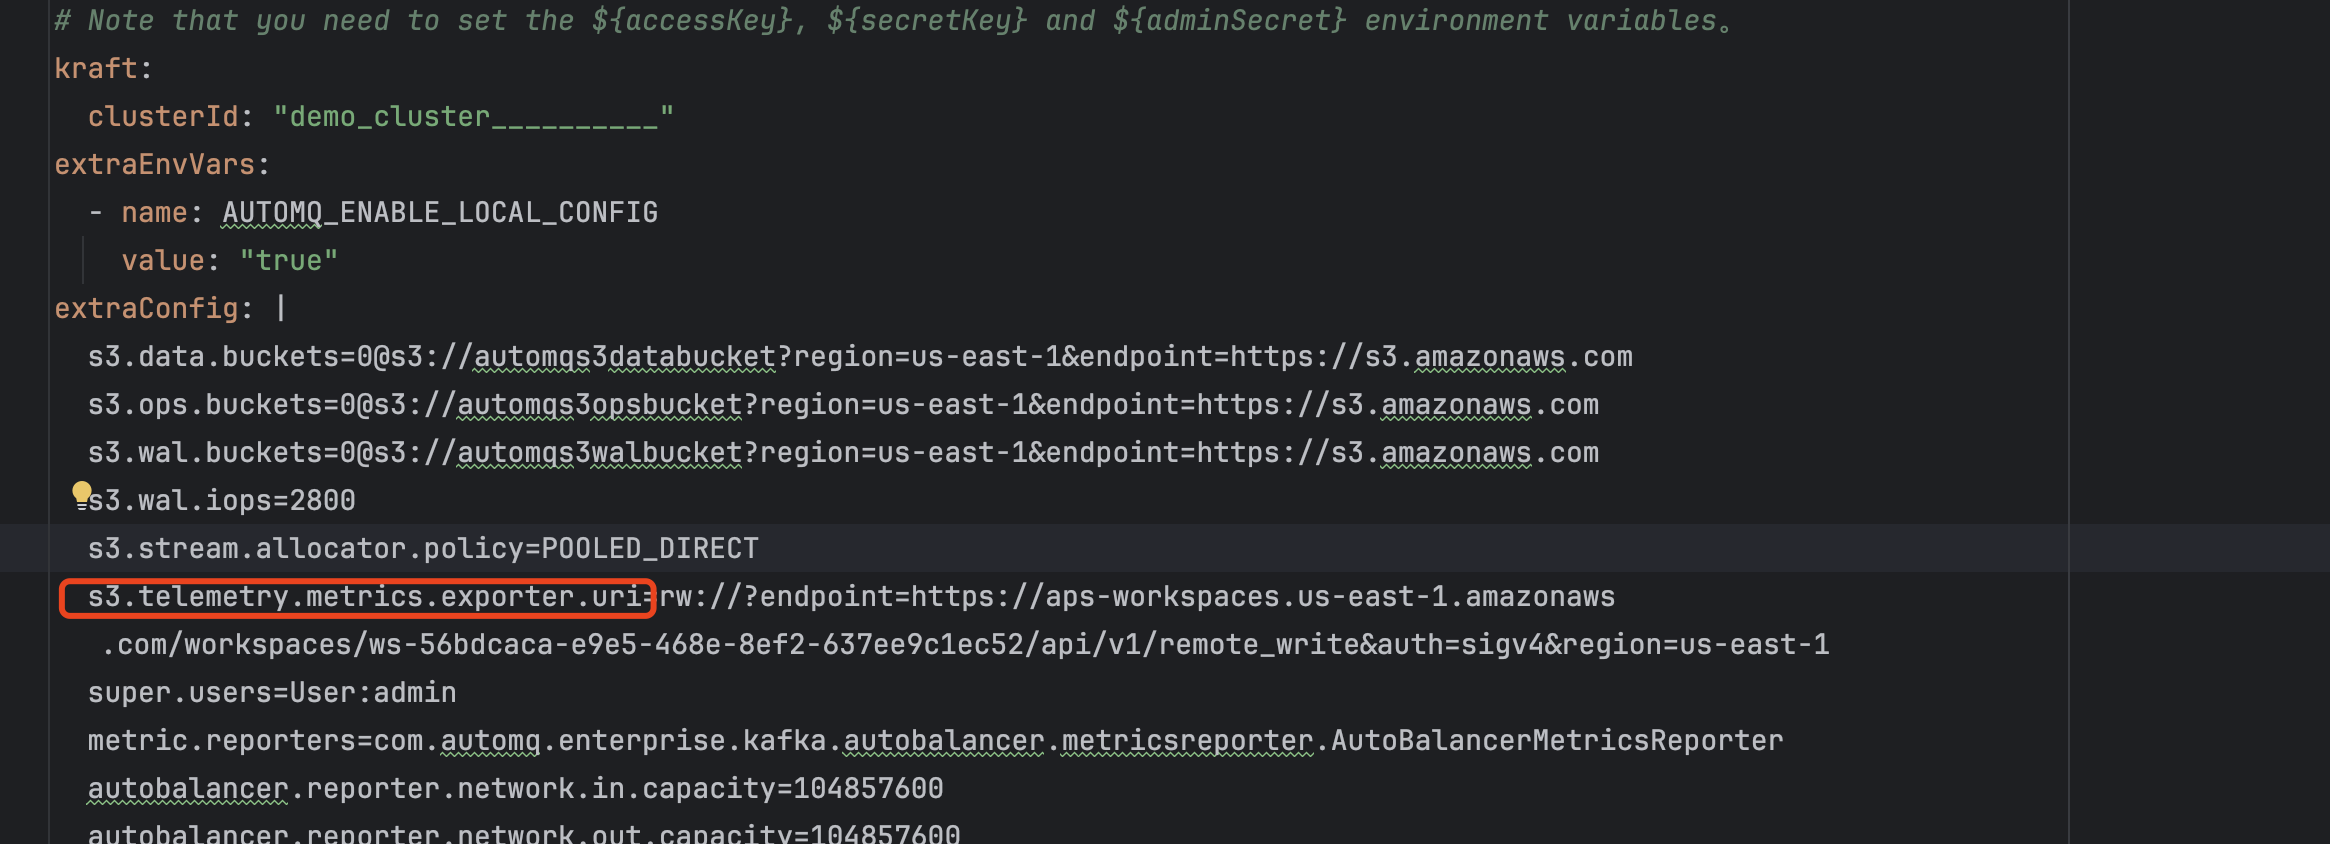
The automq-eks-example project includes a value yaml named aws.yaml . Terraform will create an AWS Prometheus Workspace by default. Replace the value of s3.telemetry.metrics.exporter.uri in aws.yaml with the value of automq_prometheus_metrics_uri from the output information after executing terraform apply .
Then use the automq-eks-example project's aws.yaml file as the Value Yaml for Helm Chart. We will use the configuration of this yaml file to install AutoMQ Helm Chart.
helm install automq automq-enterprise-1.2.0-chart-rc0.tgz -f aws.yaml
After installing the Chart, the information of the access point will be printed.
Each Kafka broker can be accessed by producers via port 9092 on the following DNS name(s) from within your cluster:

    automq-automq-enterprise-controller-0.automq-automq-enterprise-controller-headless.default.svc.cluster.local:9092
    automq-automq-enterprise-controller-1.automq-automq-enterprise-controller-headless.default.svc.cluster.local:9092
    automq-automq-enterprise-controller-2.automq-automq-enterprise-controller-headless.default.svc.cluster.local:9092
    automq-automq-enterprise-broker-0.automq-automq-enterprise-broker-headless.default.svc.cluster.local:9092
At this point, we can see the corresponding Pod on the Kubernetes

Terraform has already created AWS Prometheus by default. Refer to the Readme under grafana-demo in the automq-eks-example project and use the install.sh script to start a Grafana locally. Open the Grafana console at http://127.0.0.1:3000 (default username and password are both admin ):
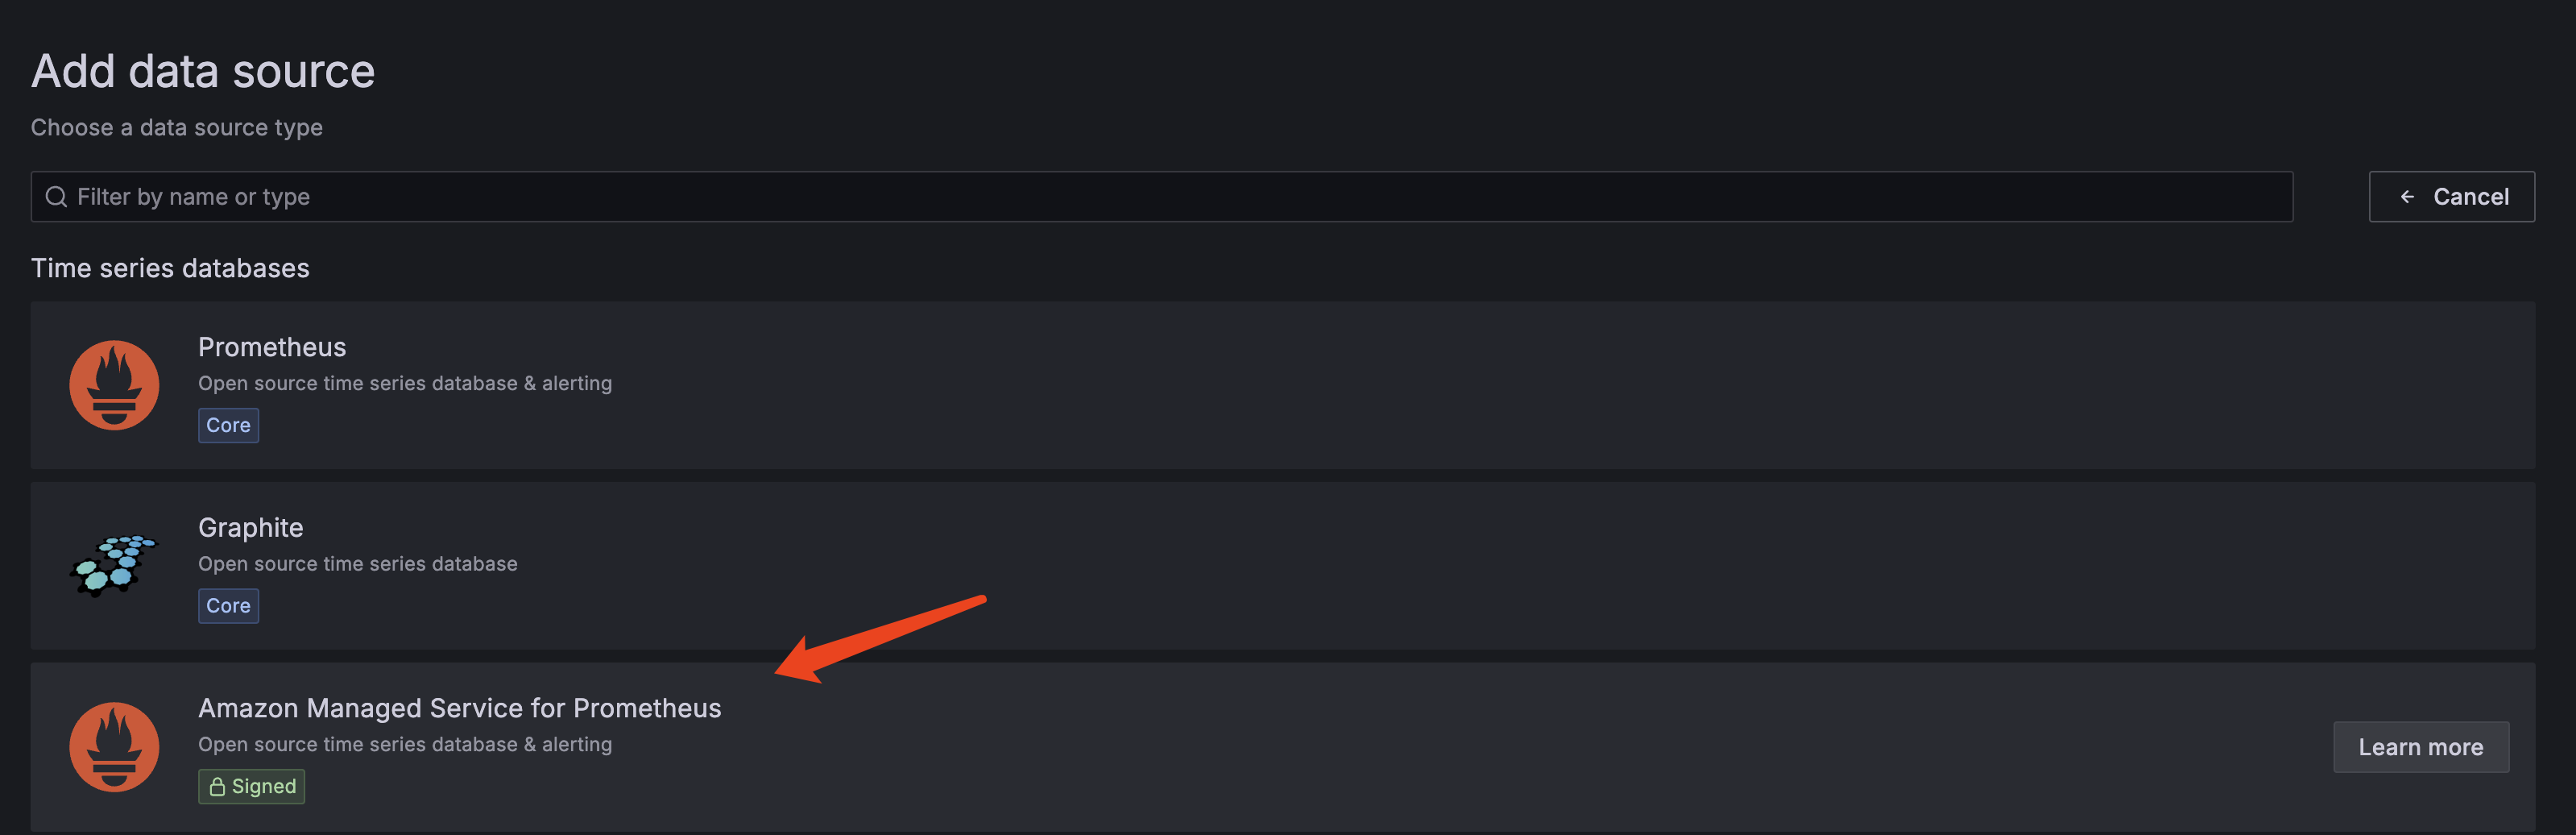
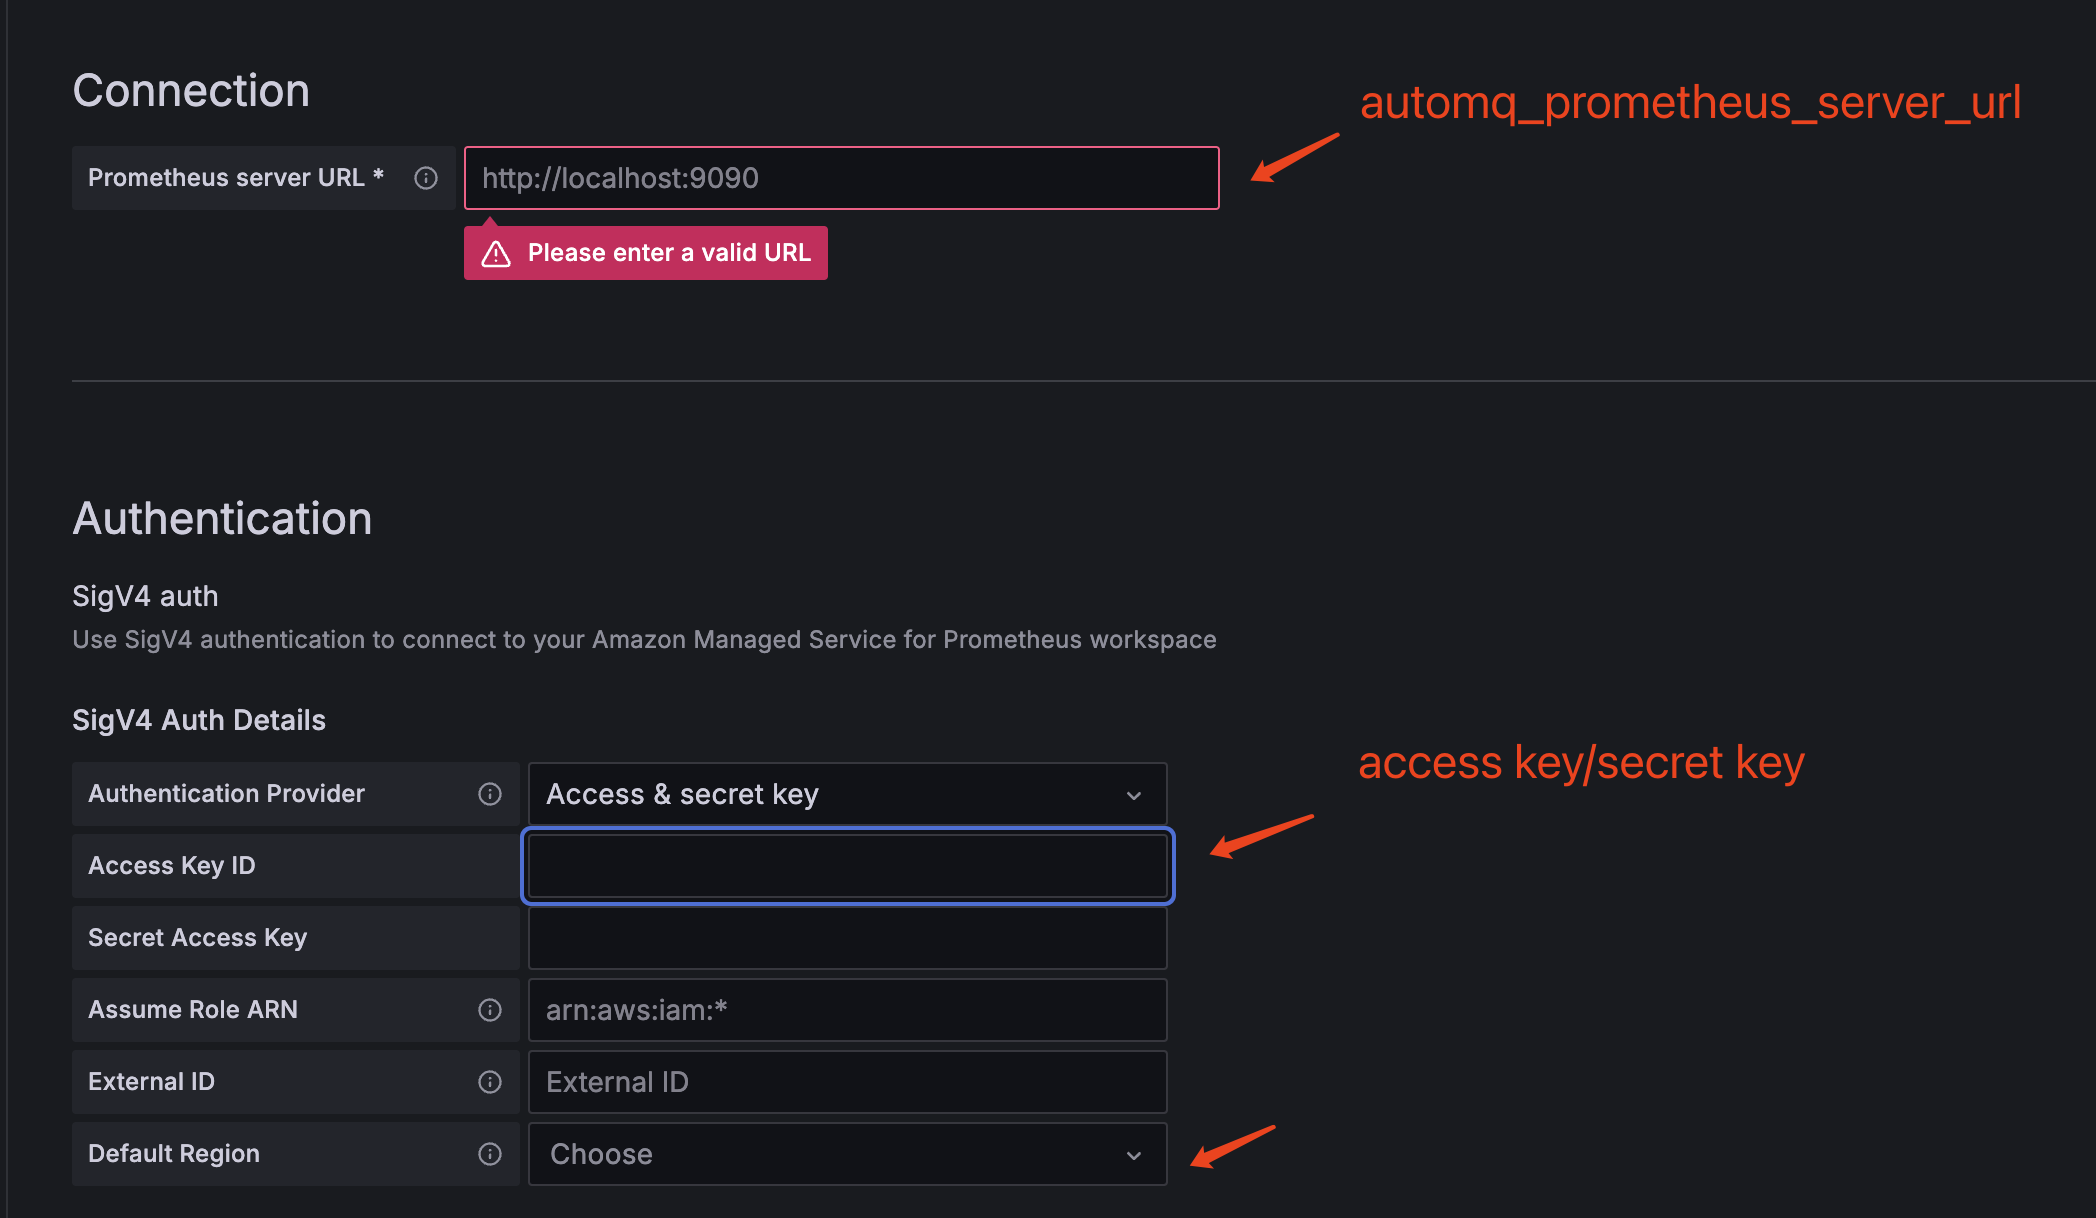
The Prometheus server URL required for the data source can be obtained from the `automq_prometheus_server_url` in the terraform output. Long-term credential information is required for authentication. We can access the AWS console through the workshop console, create a new IAM user in the IAM service, create an access key, and assign the following minimal permissions:
{
    "Version": "2012-10-17",
    "Statement": [
        {
            "Sid": "VisualEditor0",
            "Effect": "Allow",
            "Action": [
                "aps:RemoteWrite",
                "aps:QueryMetrics",
                "aps:GetMetricMetadata",
                "aps:GetLabels",
                "aps:GetSeries"
            ],
            "Resource": "${YOUR_AMP_ARN}"
        }
    ]
}

Fill in the Access & Secret Key credential information for the newly created user on AWS by selecting Access & Secret Key.
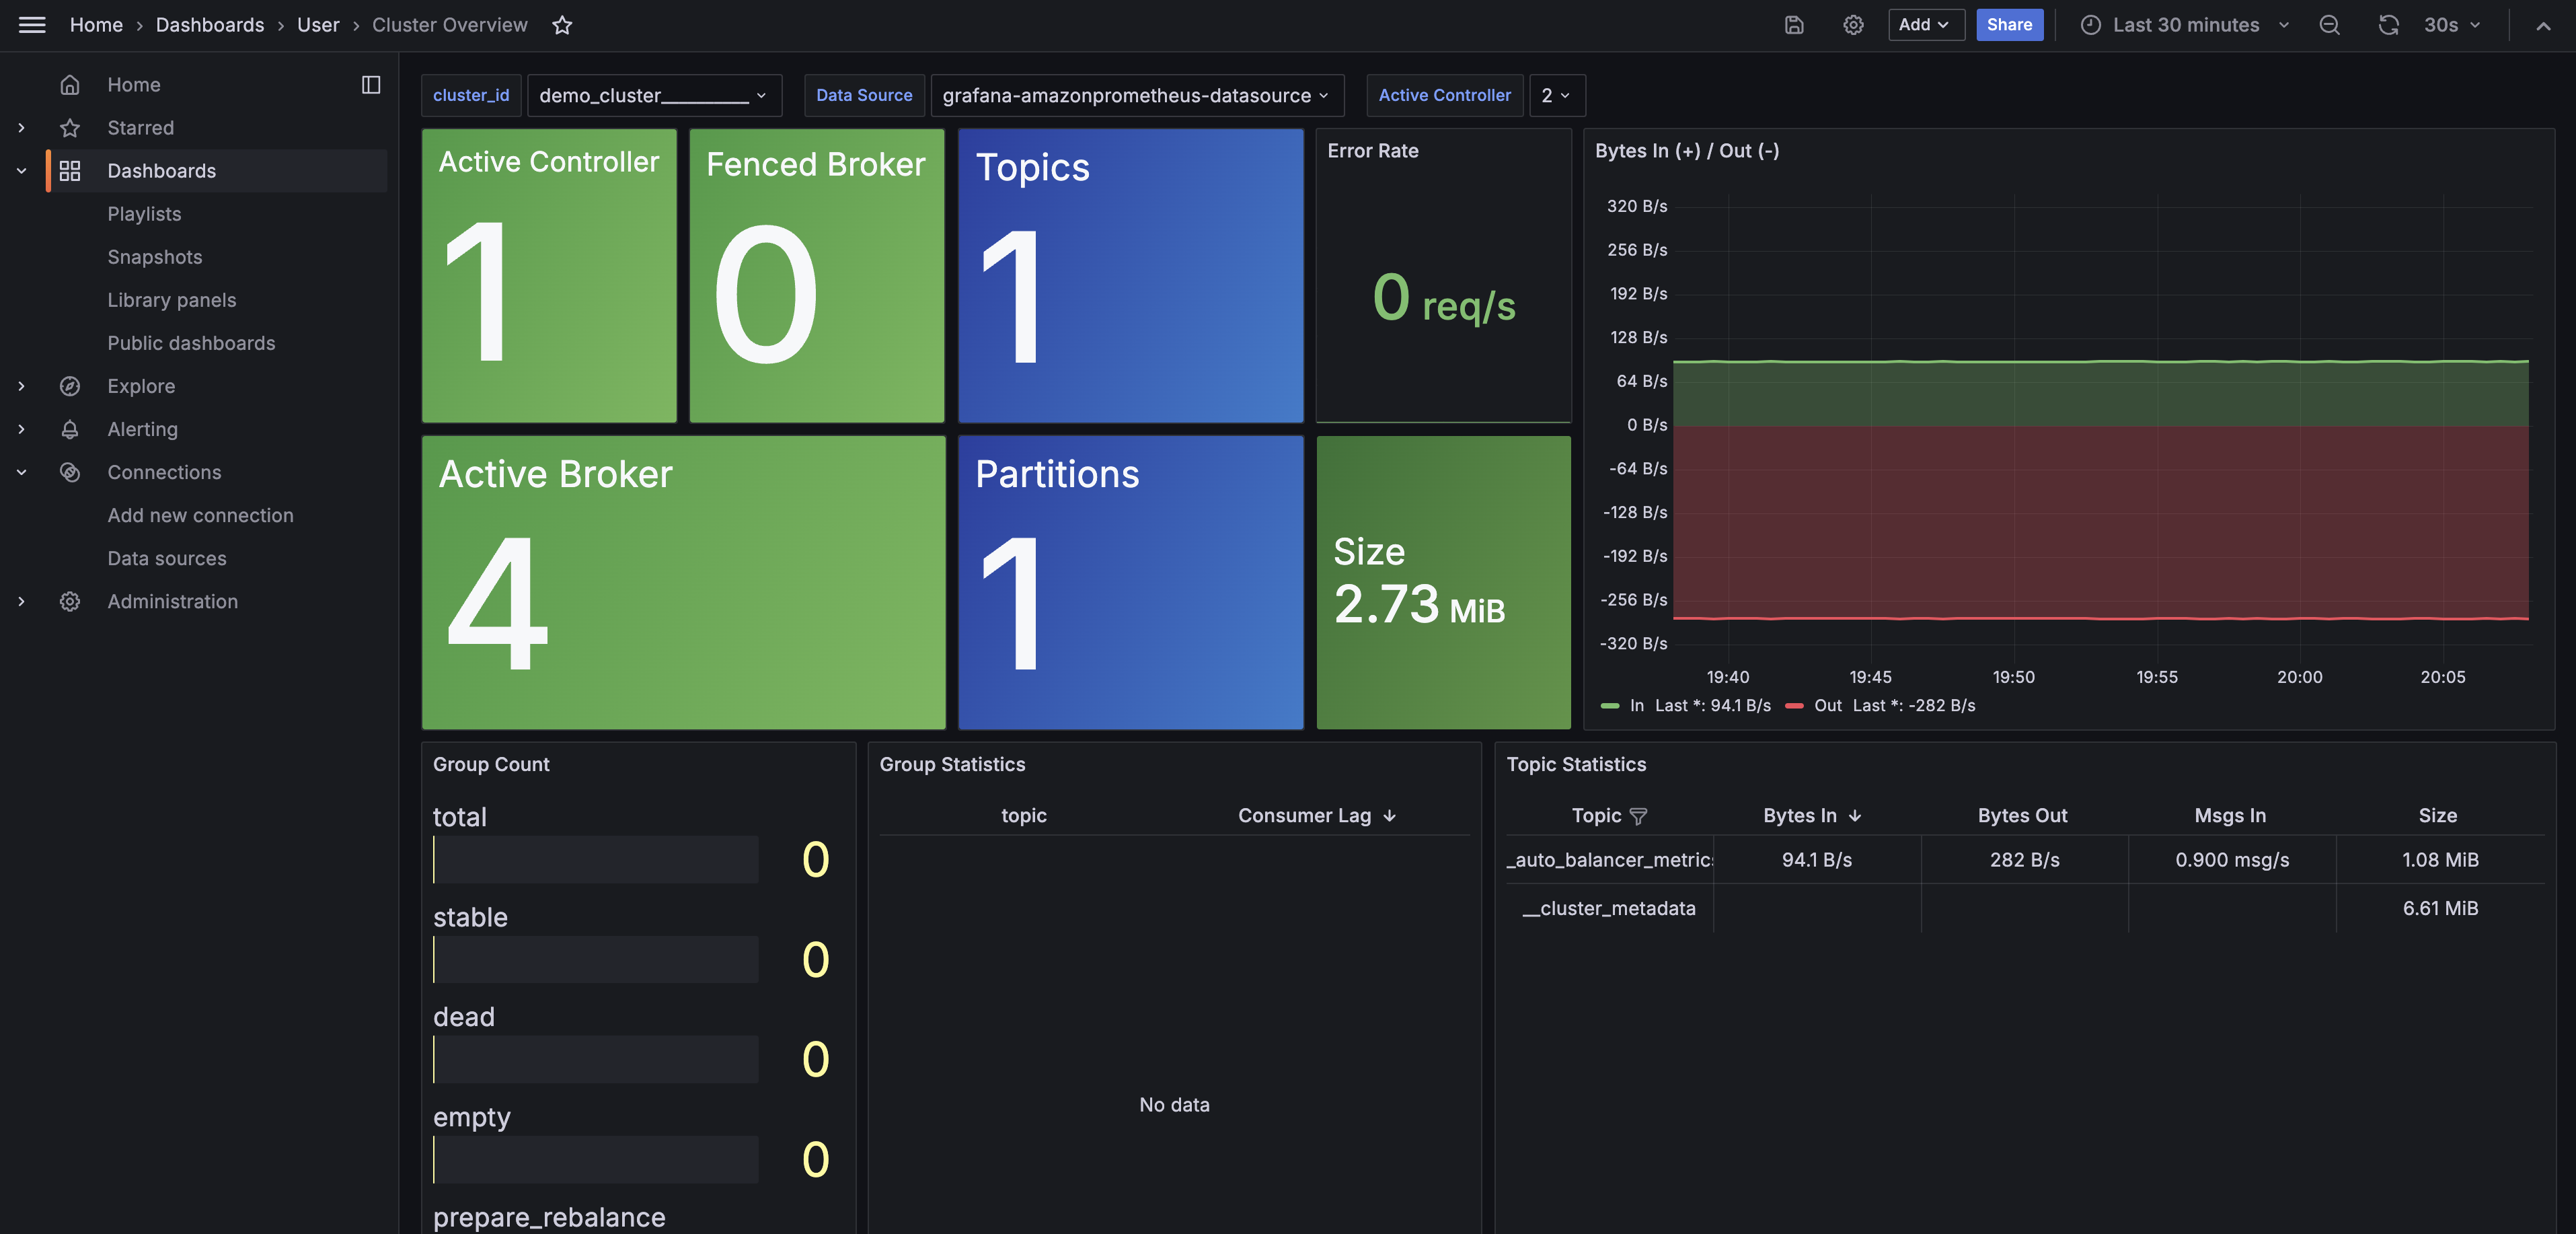
After the configuration is complete, you can view the monitoring information of AutoMQ through the built-in Grafana template of AutoMQ.
Since SASL is enabled by default, you need to prepare client.properties locally in advance for authentication (admin/admin is the default account and password).
security.protocol=SASL_PLAINTEXT
sasl.mechanism=SCRAM-SHA-256
sasl.jaas.config=org.apache.kafka.common.security.scram.ScramLoginModule required \
    username="admin" \
    password="admin";
Start a Pod as a Client using AutoMQ's mirroring and copy client.properties files to the /tmp directory of the client pod.
kubectl run automq-automq-enterprise-client --restart='Never' --image registry.cn-shanghai.aliyuncs.com/automq/automq-enterprise:1.1.0 --namespace default --command -- sleep infinity
kubectl cp --namespace default client.properties automq-automq-enterprise-client:/tmp/client.properties
kubectl exec --tty -i automq-automq-enterprise-client --namespace default -- bash
After entering the client pod, execute the following command in the /opt/automq/kafka directory to complete the message sending and receiving:
cd /opt/automq/kafka

bin/kafka-console-producer.sh \
            --producer.config /tmp/client.properties \
            --bootstrap-server automq-automq-enterprise.default.svc.cluster.local:9092 \
            --topic test

bin/kafka-console-consumer.sh \
            --consumer.config /tmp/client.properties \
            --bootstrap-server automq-automq-enterprise.default.svc.cluster.local:9092 \
            --topic test \
            --from-beginning