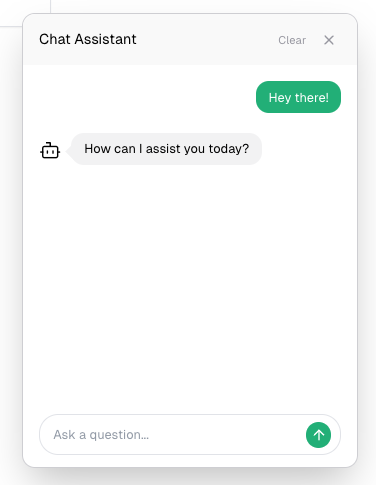
A customizable Reach chat component that combines Upstash Vector for similarity search, Together AI for LLM, and Vercel AI SDK for streaming responses. This ready-to-use component provides an out of the box solution for adding RAG-Powered chat interfaces to your Next.js application.
 Closed State |
 Open State |
⚡ Streaming responses support
💻 Server actions
📱 Responsive design
🔍 Real-time context retrieval
💾 Persistent chat history
🎨 Fully customizable UI components
🎨 Dark/light mode support
# Using npm
npm install @upstash/rag-chat-component

# Using pnpm
pnpm add @upstash/rag-chat-component

# Using yarn
yarn add @upstash/rag-chat-componentCreate an Upstash Vector database and set up the environment variables as below. If you don't have an account, you can start by going to Upstash Console.
Choose an embedding model when creating an index in Upstash Vector.
UPSTASH_VECTOR_REST_URL=
UPSTASH_VECTOR_REST_TOKEN=

# Optional for persistent chat history
UPSTASH_REDIS_REST_URL=
UPSTASH_REDIS_REST_TOKEN=

OPENAI_API_KEY=

TOGETHER_API_KEY=

# Optional
TOGETHER_MODEL=
In your tailwind.config.ts file, add the configuration below:
import type { Config } from "tailwindcss";

export default {
  content: ["./node_modules/@upstash/rag-chat-component/**/*.{js,mjs}"],
} satisfies Config;The RAG Chat Component can be integrated into your application using two straightforward approaches. Choose the method that best fits your project structure:
Create a seperate component file with the use client directive, then import and use it anywhere in your application.
// components/chat.tsx
"use client";

import { ChatComponent } from "@upstash/rag-chat-component";

export const Chat = () => {
  return <ChatComponent />;
};
// page.tsx
import { Chat } from "./components/chat";
export default function Home() {
return (
<>
<Chat />
<p>Home</p>
</>
);
}Alternatively, import and use the ChatComponent directly in your client-side pages.
// page.tsx
"use client";
import { ChatComponent } from "@upstash/rag-chat-component";

export default function Home() {
  return (
    <>
      <ChatComponent />
      <p>Home</p>
    </>
  );
}It's possible to choose one of the together.ai models for the chat.
Default model is meta-llama/Meta-Llama-3.1-8B-Instruct-Turbo. You can configure it in the environment variables.
TOGETHER_MODEL="deepseek-ai/DeepSeek-V3"
You can add content to your RAG Chat component in several ways:
1. Using Upstash Vector SDK
Upstash has Vector SDKs in JS and Python. You can use those SDK to insert data to your Vector index.
For other languages you can use Vector REST API.
2. Using Upstash Vector UI
For testing purpose, you can add your data directly through the Upstash Vector Console:
- Navigate to Upstash Console.
- Go to details page of the Vector database.
- Navigate to Data Browser Tab.
- Here, you can upsert data or upload a PDF.
3. docs2vector tool
If you are planning to insert your documentation (markdown files) to your Vector index, then you can use docs2vector tool.
We welcome contributions! Please see our contributing guidelines for more details.
MIT License - see the LICENSE file for details.
