Shepherd Scroll implements a custom Scroll View which provides easy handling of animation over child view controllers during the scroll.
- Add to your Podfile
pod 'ShepherdScroll' ~> '0.1.5'After install your pod, import Shepherd Scroll to the UIViewController which the scroll will be embedded in (make sure you have builded your application before that).
import ShepherdScrollFirstly you'd need an array of UIViewController which implements Animatable protocol. Wtsheep is that?
Create a standard UIViewController, import ShepherdScroll and inherit Animatable protocol to the UIViewController.
import UIKit
import ShepherdScroll

class SheepAViewController: UIViewController, Animatable { ... }
Using Animatable you'll be able to control your own animation as you want! Exactly! Shepherd Scroll doesn't know what the view controller's content is, giving you the freedom to create animations, parallax and much more on your way.
To do that, call the method animate() where you'll receive a value between 0 and 1. See this value as a timeline from 0% to 100% of the animation. With this value you'll get nice results during the scroll (no matter what direction you scroll).
override func animate(step: CGFloat) {
    label.alpha = 0.3 + step
    label.transform = CGAffineTransform(scaleX: 1 + step, y: 1 + step)
            .concatenating(CGAffineTransform(translationX: 0, y: 200 * step))
}import UIKit
import ShepherdScroll
class SheepAViewController: UIViewController, Animatable {
let label: UILabel = {
let label = UILabel()
label.font = UIFont(name: "Avenir", size: 20)
label.textColor = .white
label.textAlignment = .center
label.alpha = 0.3
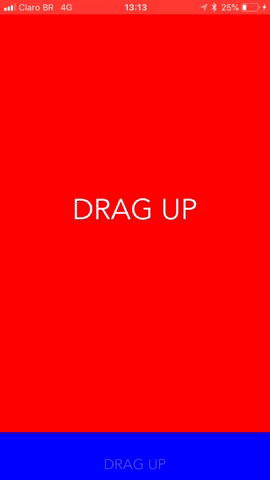
label.text = "DRAG UP"
label.translatesAutoresizingMaskIntoConstraints = false
return label
}()
override func viewDidLoad() {
super.viewDidLoad()
view.backgroundColor = .blue
setupLayout()
}
func animate(step: CGFloat) {
label.alpha = 0.3 + step
label.transform = CGAffineTransform(scaleX: 1 + step, y: 1 + step)
.concatenating(CGAffineTransform(translationX: 0, y: 200 * step))
}
private func setupLayout() {
view.addSubview(label)
NSLayoutConstraint.activate([
label.topAnchor.constraint(equalTo: view.topAnchor, constant: 20),
label.heightAnchor.constraint(equalToConstant: 50),
label.leadingAnchor.constraint(equalTo: view.leadingAnchor),
label.trailingAnchor.constraint(equalTo: view.trailingAnchor)
])
}
}You have set up your Sheep as any basic UIViewController, but here's where the magic happens! In your main UIViewController you will add the ShepherdScrollView as any UIScrollView but setting some cool parameters.
private func setupShepherdScroll() {
    scrollView = ShepherdScrollView(
        controller: self,
        viewControllers: [SheepAViewController(), SheepBViewController(), SheepCViewController()],
        size: view.frame.size,
        viewToAnimate: .next,
        orientation: .vertical,
        offset: 0.0)

    view.addSubview(scrollView)
    scrollView.translatesAutoresizingMaskIntoConstraints = false
}
After that, just set the constraint to this component.
private func setupConstraints() {
    NSLayoutConstraint.activate([
        scrollView.topAnchor.constraint(equalTo: view.topAnchor),
        scrollView.leadingAnchor.constraint(equalTo: view.leadingAnchor),
        scrollView.bottomAnchor.constraint(equalTo: view.bottomAnchor),
        scrollView.trailingAnchor.constraint(equalTo: view.trailingAnchor)
    ])
}