Adds the :Shell command for running shell commands without a pty in a scratch buffer.
:Shell COMMAND
:Shell --follow COMMAND
:Shell --stop
:Shell --edit
:Shell --last
:Shell --lua {command='COMMAND', on_exit=function() end}
:lua vim.cmd('bo sp'); vim.cmd('Shell echo left'); vim.cmd.vsplit(); vim.cmd('Shell echo right')
nvim 'Shell://COMMAND'nvim +'Shell COMMAND'- Press Ctrl-C to stop the process in the current buffer.
- Press Enter (in Normal Mode) on a line in a Shell buffer to run that line.
- Visually select a range anywhere in the buffer and press Enter to run the selected lines as one command.
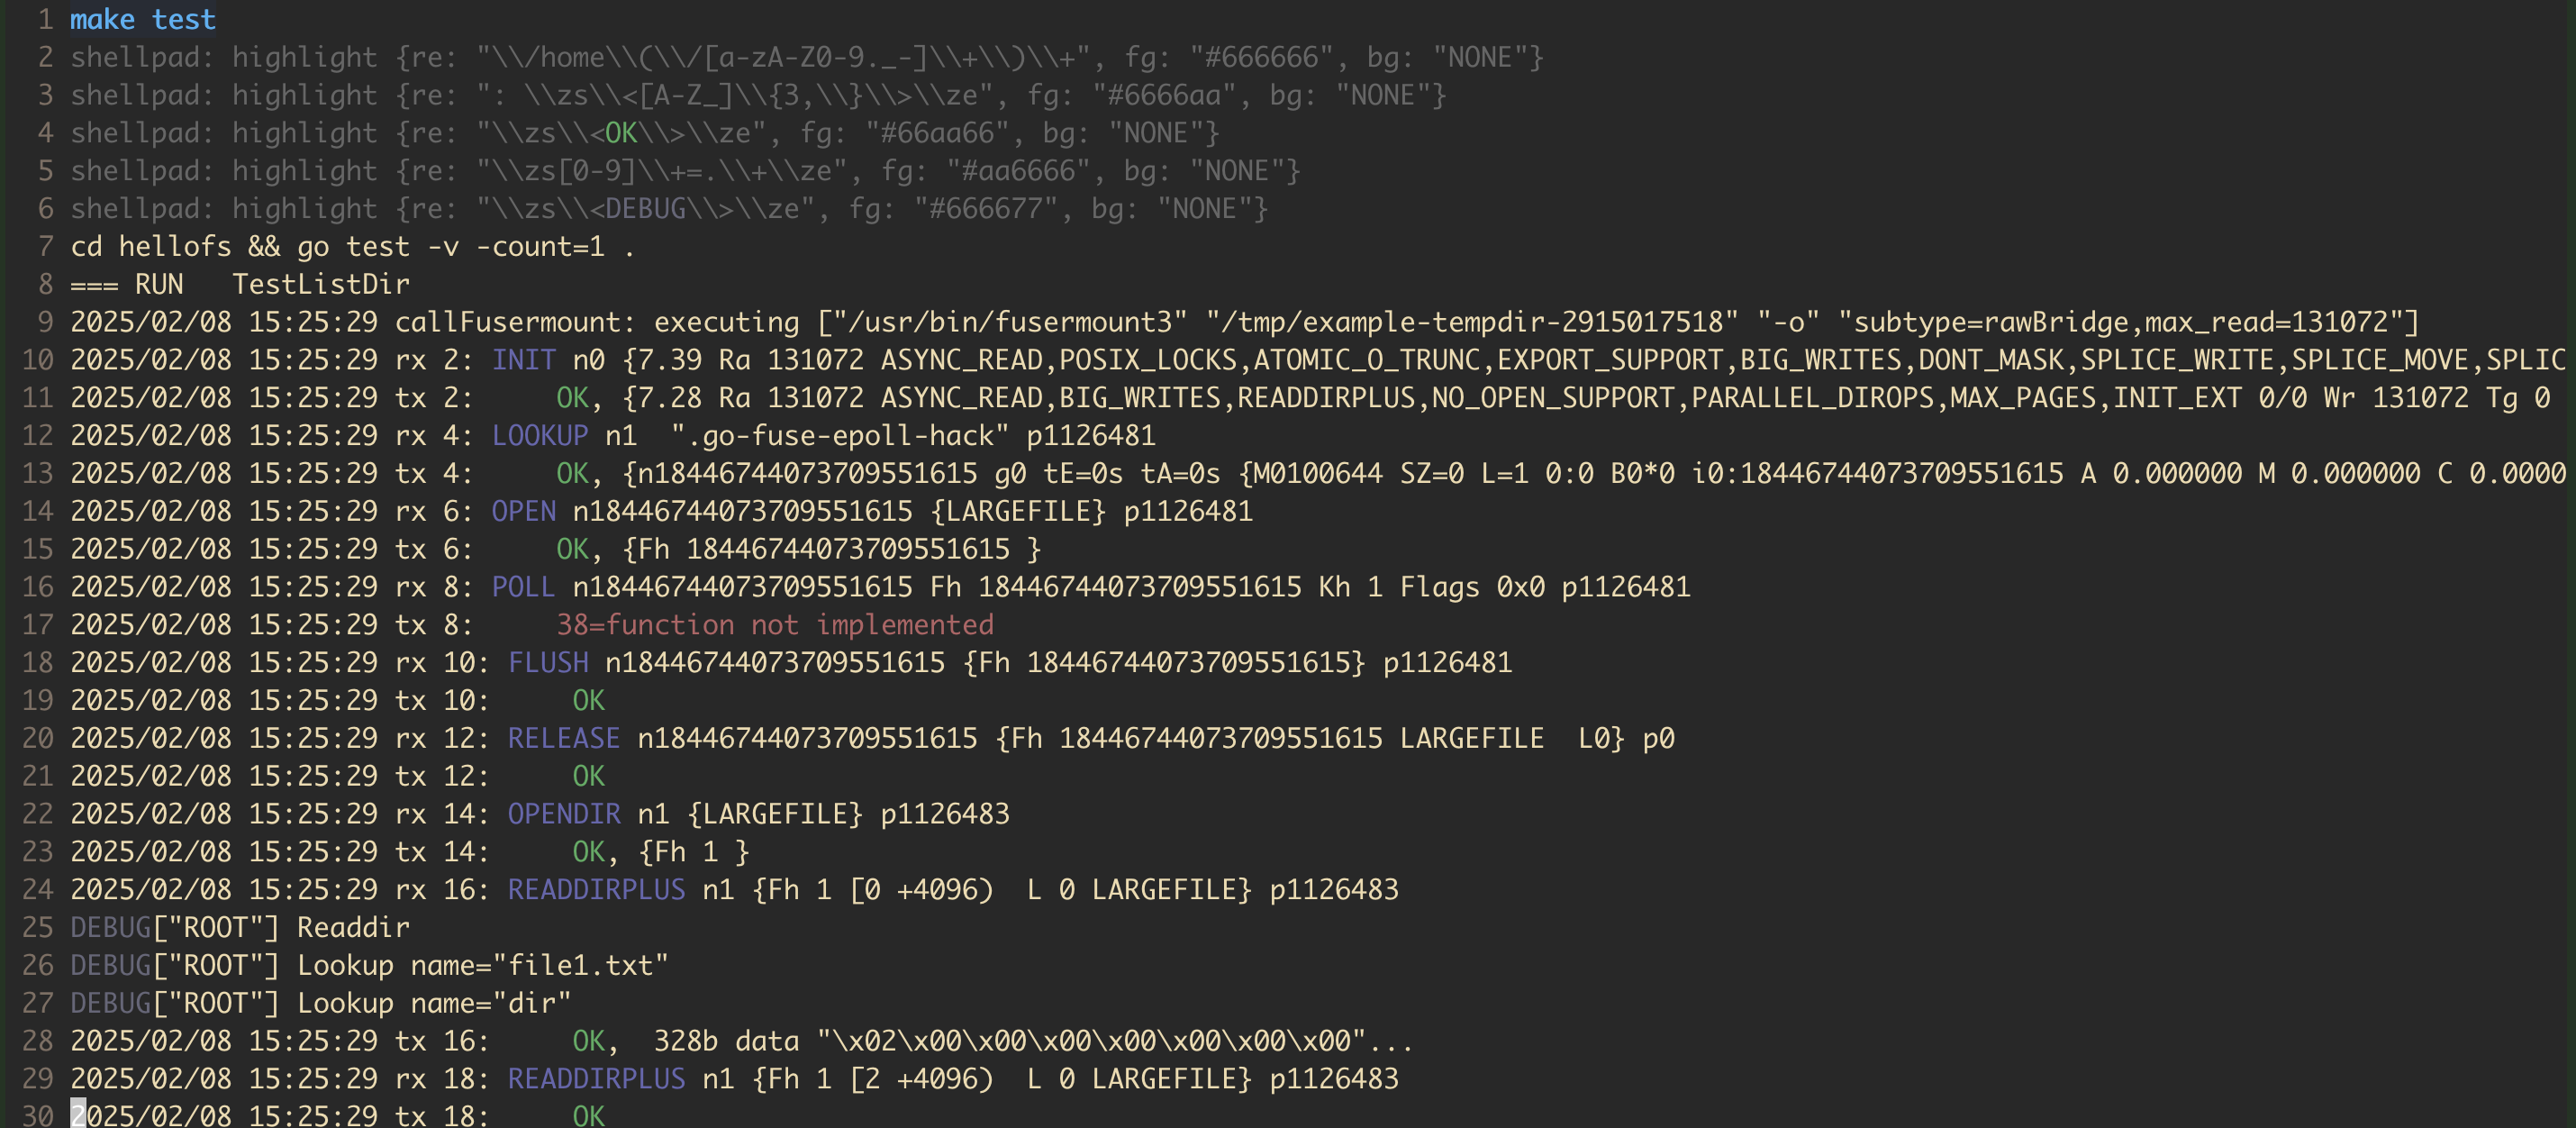
You can highlight parts of the output of the command if the output of the command a line that matches the following example:
shellpad: highlight {re: "...", fg: "...", bg: "..."}
For example, running :Shell make test-highlight will highlight all IP addresses in the output of the ping command:
test-highlight:
	@echo 'shellpad: highlight {re: "\\(\\d\\+\\.\\)\\{3\\}\\d\\+", fg: "#66aa66", bg: "NONE"}'
	ping -c 3 -i 0.1 8.8.8.8
Search for files using rg:
:Shell rg -n pattern .
View git status
:Shell git status
Run a long running command:
:Shell strace ping -c 3 localhost
:set number
Tail a log file:
:Shell tail --lines=0 -F ~/.local/state/nvim/log
Run a NeoVim Lua function after the command is completed:
:Shell --lua {command="ping -c3 localhost", on_exit=function() vim.cmd.normal("ggn") end}
Hint: In the rg example, you can press gF to jump to the file under the cursor. See :help gF.
Simple:
require('lazy').setup({
  { "shellpad/shellpad.nvim", opts = {} },
})
With Telescope integration and some suggested key mappings:
require('lazy').setup({
  {
    "shellpad/shellpad.nvim",
    dependencies = { "nvim-telescope/telescope.nvim" },
    config = function(opts)
      require('shellpad').setup(opts)

      -- If you use Telescope, you can search all your :Shell commands using the following function and mapping:
      vim.keymap.set('n', '<leader>sc', require('shellpad').telescope_history_search(), { desc = 'shellpad: [S]earch [C]ommands' })

      -- If typing `:Shell ` is too much for you, you can use the following mapping:
      vim.keymap.set('n', ';s', function() vim.api.nvim_feedkeys(':Shell ', 'n', false) end, { noremap = true, desc = 'shellpad: prepare shell command' })
    end,
  },
})
This plugin aims to compliment Tmux, :term and :r!, not to replace them. Each of them is useful in different situations.
I love Tmux, I have been using it for many years (I made a few contribution in 2015). In fact, I run everything inside Tmux sessions. But there are situations when running a command inside NeoVim is more convenient for me and helps me stay in flow while programming.
- There is no builtin communication between a Tmux pane and NeoVim. It can be quite complicated to copy a string (eg filename) from a command stdout in a Tmux pane to NeoVim.
- There is no way to further process the output of a command in a Tmux pane. You will have to either copy-paste or save the buffer and open it in NeoVim. With :Shell, you have access to all NeoVim features for further processing the output.
- In Tmux, the output of each command is appended to the previous one. This makes it hard to figure out if a search match belongs to a previous command or the last command. So, in effect you will have to either clear history of the Tmux pane, or exit the pane and create a new one. With :Shell, each command output has its own buffer.
- Screencast comparing :term and :Shell
- :term has colors and gets user input. :Shell has no pty hence no colors and is only useful for non-interactive commands. (Pty is disabled to make sure lines are not wrapped as mentioned in the next item)
- :term output is wrapped and difficult to work with (see neovim/neovim#2514). :Shell does not wrap lines in its output.
- :Shell uses a normal buffer, with no special terminal mode. The :term buffers have a special terminal mode. With :term, if you enter the Insert mode on a completed process, and press any key, the whole buffer is closed and deleted. In :Shell, you can enter and leave the Insert mode like any other buffer.
- By default, leaving insert mode from a :term buffer is done via thr special key sequence ctrl-\ ctrl-n. In :Shell, you just press the escape key, like any other buffer.
- :Shell process is stopped when the buffer window is closed. :term processes keep running even when the window is closed, because the buffer still exists.
- :term and jobstart have a bug where the process output is truncated (see neovim/neovim#26543). :Shell provides a workaround by simply sleeping for 0.5s. This is good enough for most usecases until the bug is resolved unpstream.
- :term buffers are not modifiable by default. You can process :Shell buffers with other commands like :%!sort | uniq -c | sort. If you want to do that with :term, you will need to make the buffer modifiable, and remove the empty lines. Furthermore, the :term output is wrapped to the current window width, so the output is just unreliable.
- Not a difference but worth mentioning: Both :term and :Shell can run commands from terminal using term://COMMAND and Shell://COMMAND.
The most important thing I need from :term to use it more is to allow setting the width of the pty, instead of getting the width from the current window.
- :r! blocks until the process is completed, but :Shell is async and appends the output to the buffer as it is happening
- :Shell creates a new scratch buffer, instead of using the current buffer
- :! opens a special buffer, you cannot move the cursor around inside it or do anything that you can do in normal buffers like yanking a line or gf or gF. The :! window is closed when you press any key. But :Shell buffers let you do those things.