我们之前说过,前序遍历的 Morris 方法,如果已经掌握,今天中序遍历的 Morris 方法也就没有什么难度,仅仅修改了一丢丢。
我们先来回顾一下前序遍历 Morris 方法的代码部分。
前序遍历 Morris 代码
class Solution {
    public List<Integer> preorderTraversal(TreeNode root) {

        List<Integer> list = new ArrayList<>();
        if (root == null) {
            return list;
        }
        TreeNode p1 = root; TreeNode p2 = null;
        while (p1 != null) {
            p2 = p1.left;
            if (p2 != null) {
                //找到左子树的最右叶子节点
                while (p2.right != null && p2.right != p1) {
                    p2 = p2.right;
                }
                //添加 right 指针,对应 right 指针为 null 的情况
                //标注 1
                if (p2.right == null) {
                    list.add(p1.val);
                    p2.right = p1;
                    p1 = p1.left;
                    continue;
                }
                //对应 right 指针存在的情况,则去掉 right 指针
                p2.right = null;
                //标注2
            } else {
                list.add(p1.val);
            }
            //移动 p1
            p1 = p1.right;
        }
        return list;
    }
}
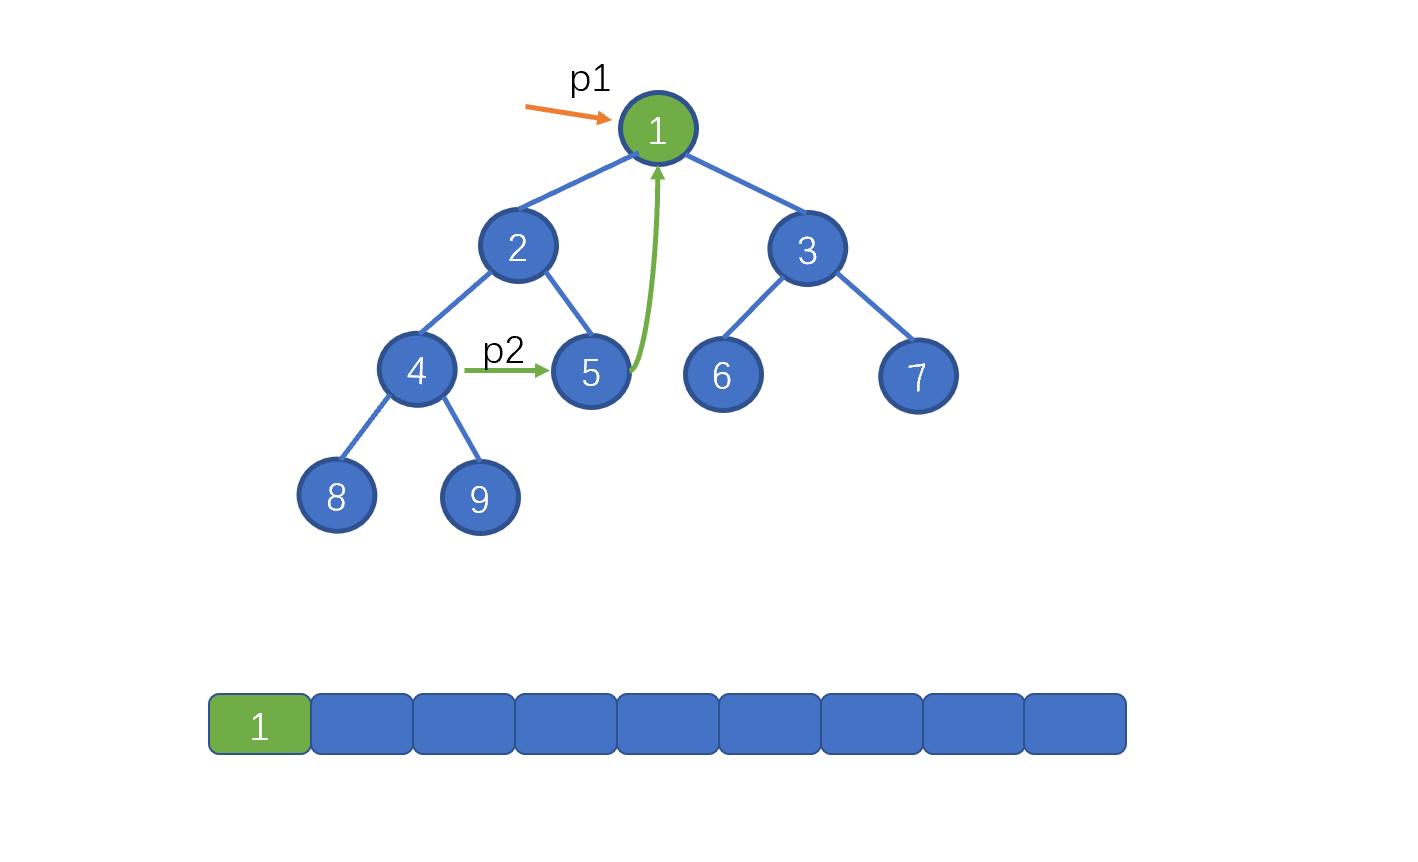
我们先来看标注 1 的部分,这里的含义是,当找到 p1 指向节点的左子树中的最右子节点时。也就是下图中的情况,此时我们需要将 p1 指向的节点值,存入 list。
上述为前序遍历时的情况,那么中序遍历应该如何操作嘞。
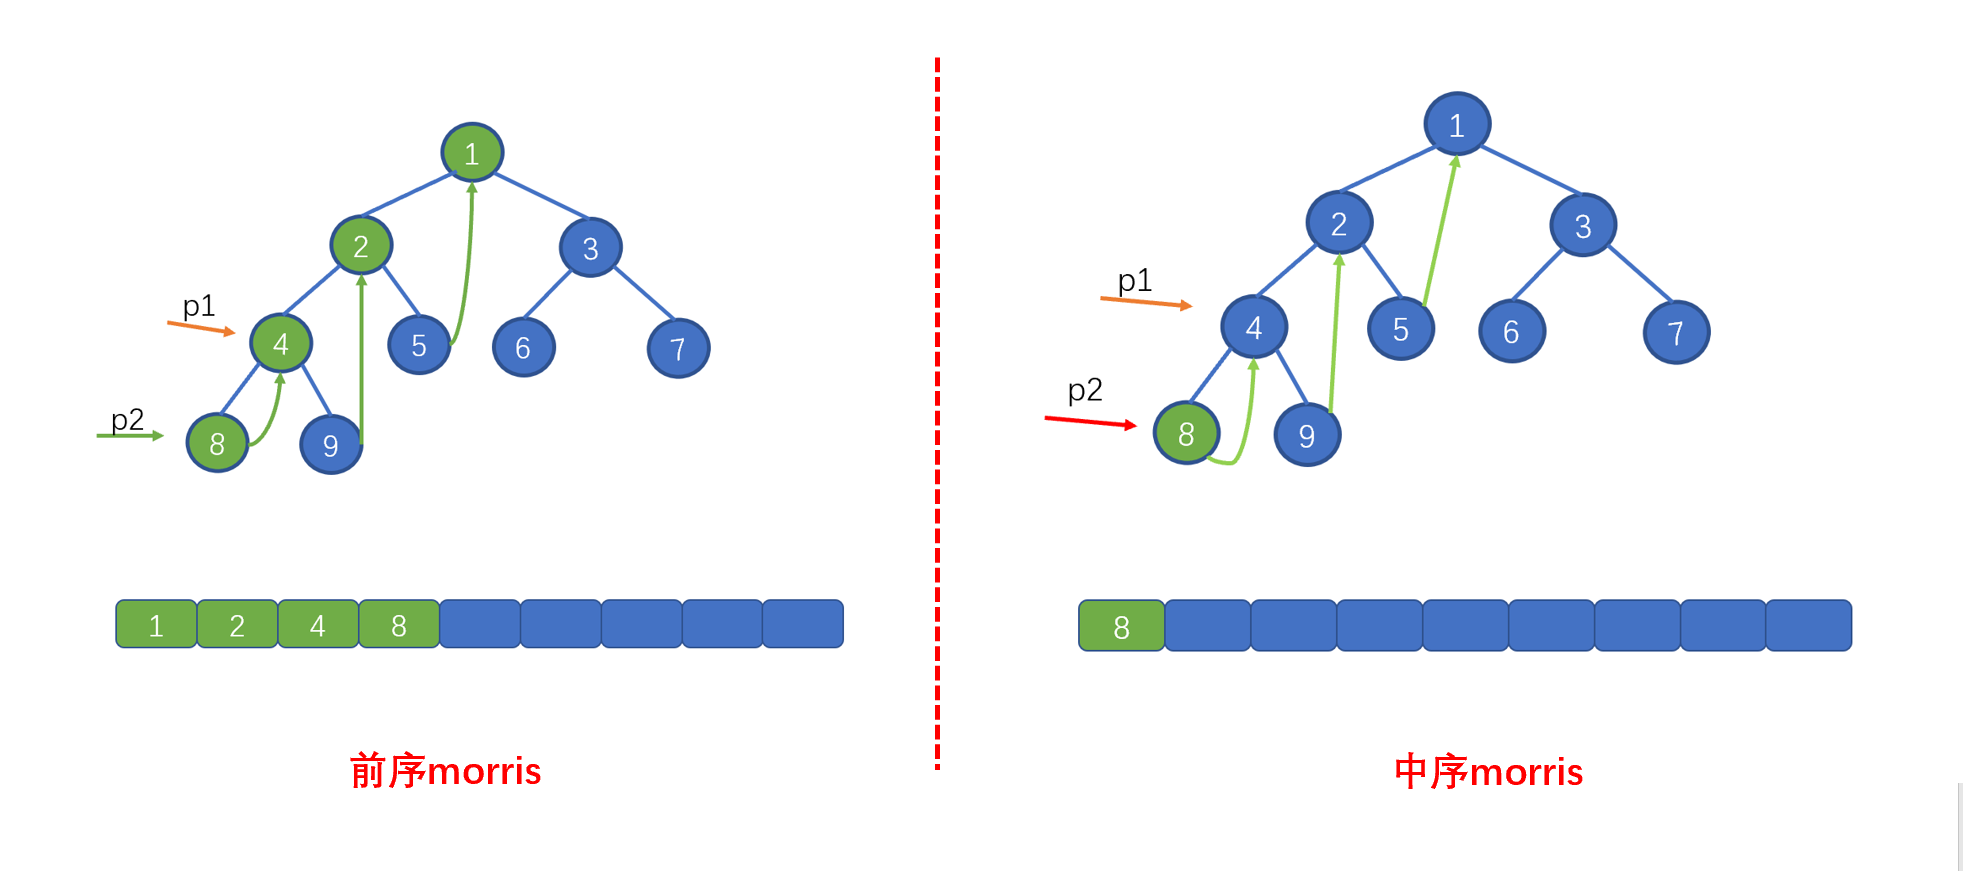
前序遍历我们需要移动 p1 指针,p1 = p1.left 这样做的原因和上述迭代法原理一致,找到我们当前需要遍历的那个节点。
我们还需要修改哪里呢?见下图
我们在前序遍历时,遇到 p2.right == p1的情况时,则会执行 p2.right == null 并让 p1 = p1.right,这样做是因为,我们此时 p1 指向的值已经遍历完毕,为了防止重复遍历。
但是呢,在我们的中序 Morris 中我们遇到p2.right == p1此时 p1 还未遍历,所以我们需要在上面两条代码之间添加一行代码list.add(p1.val);
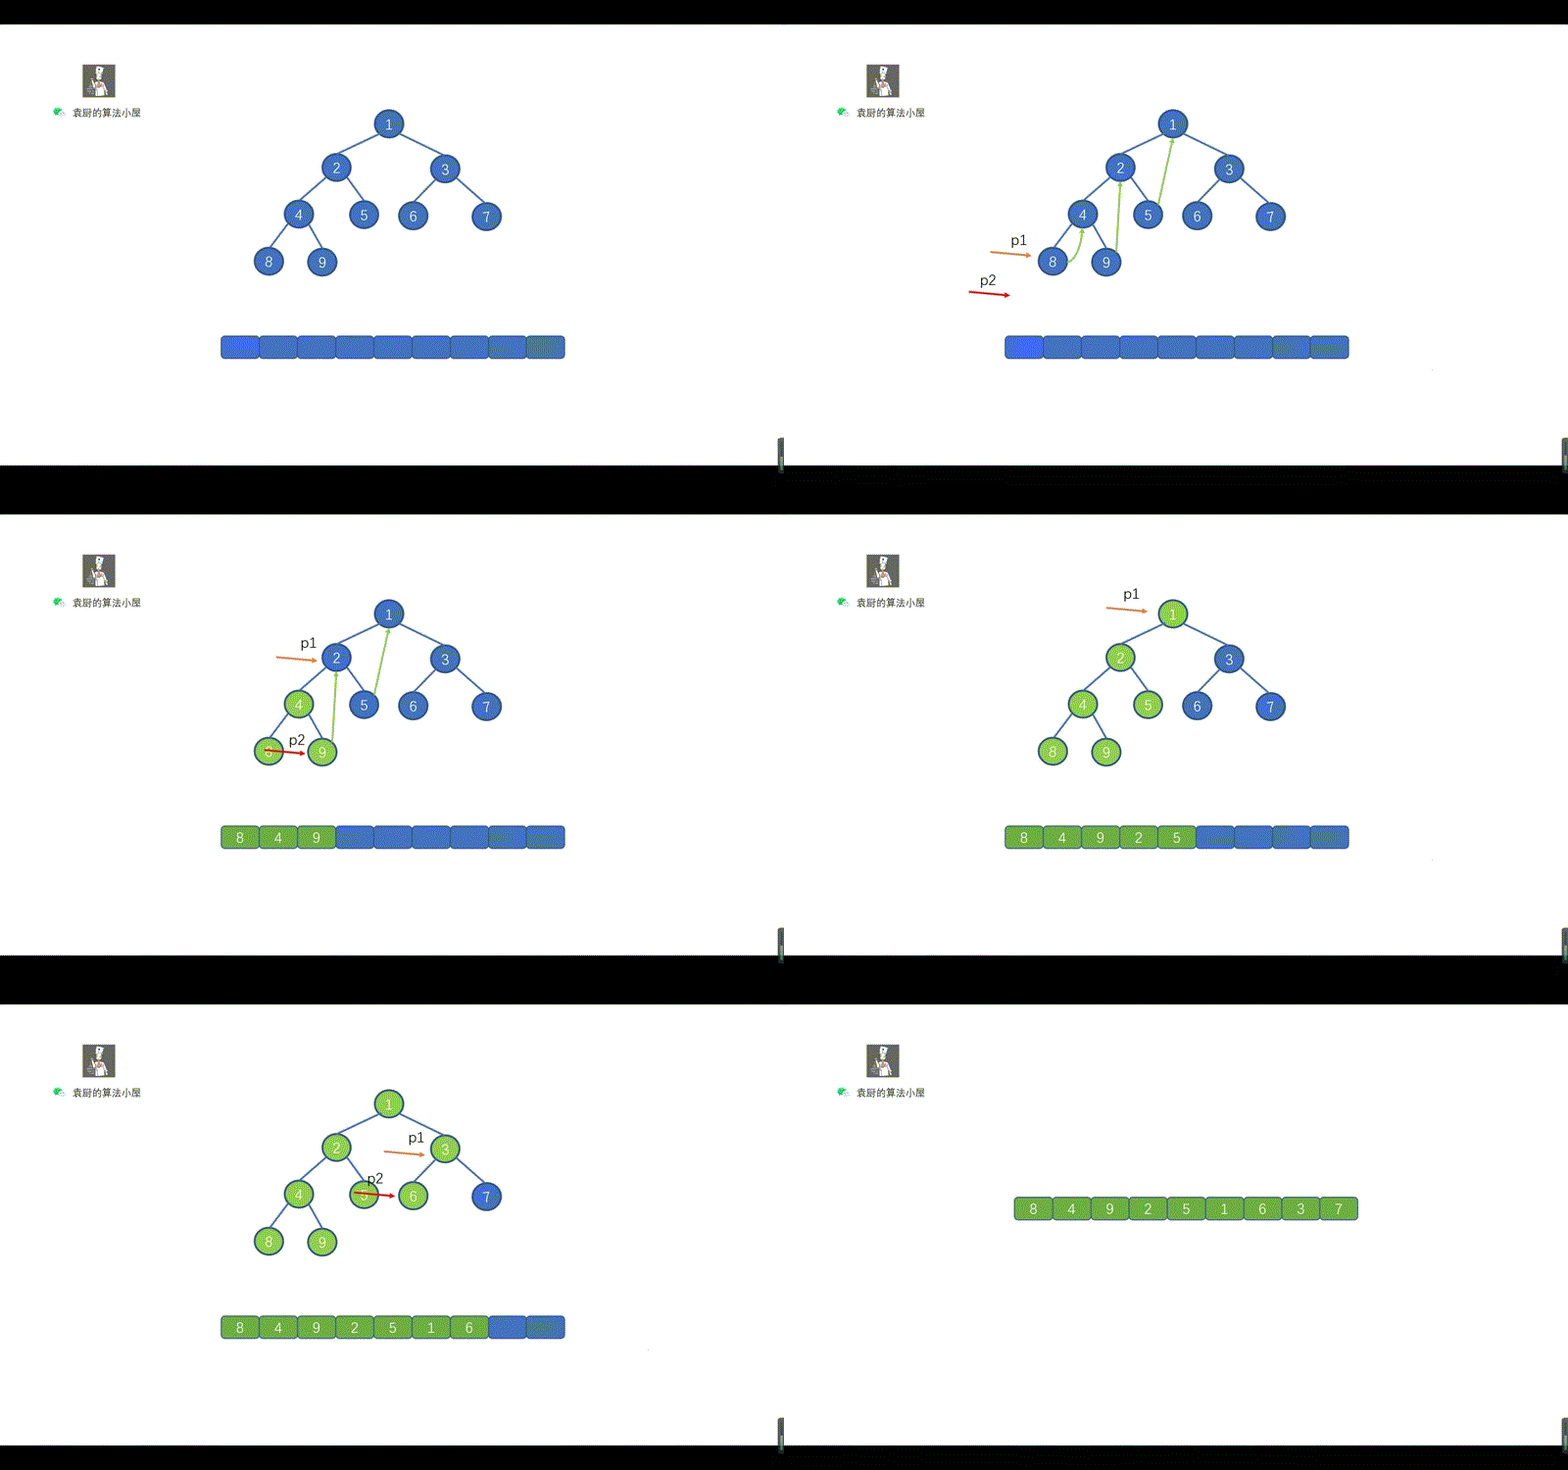
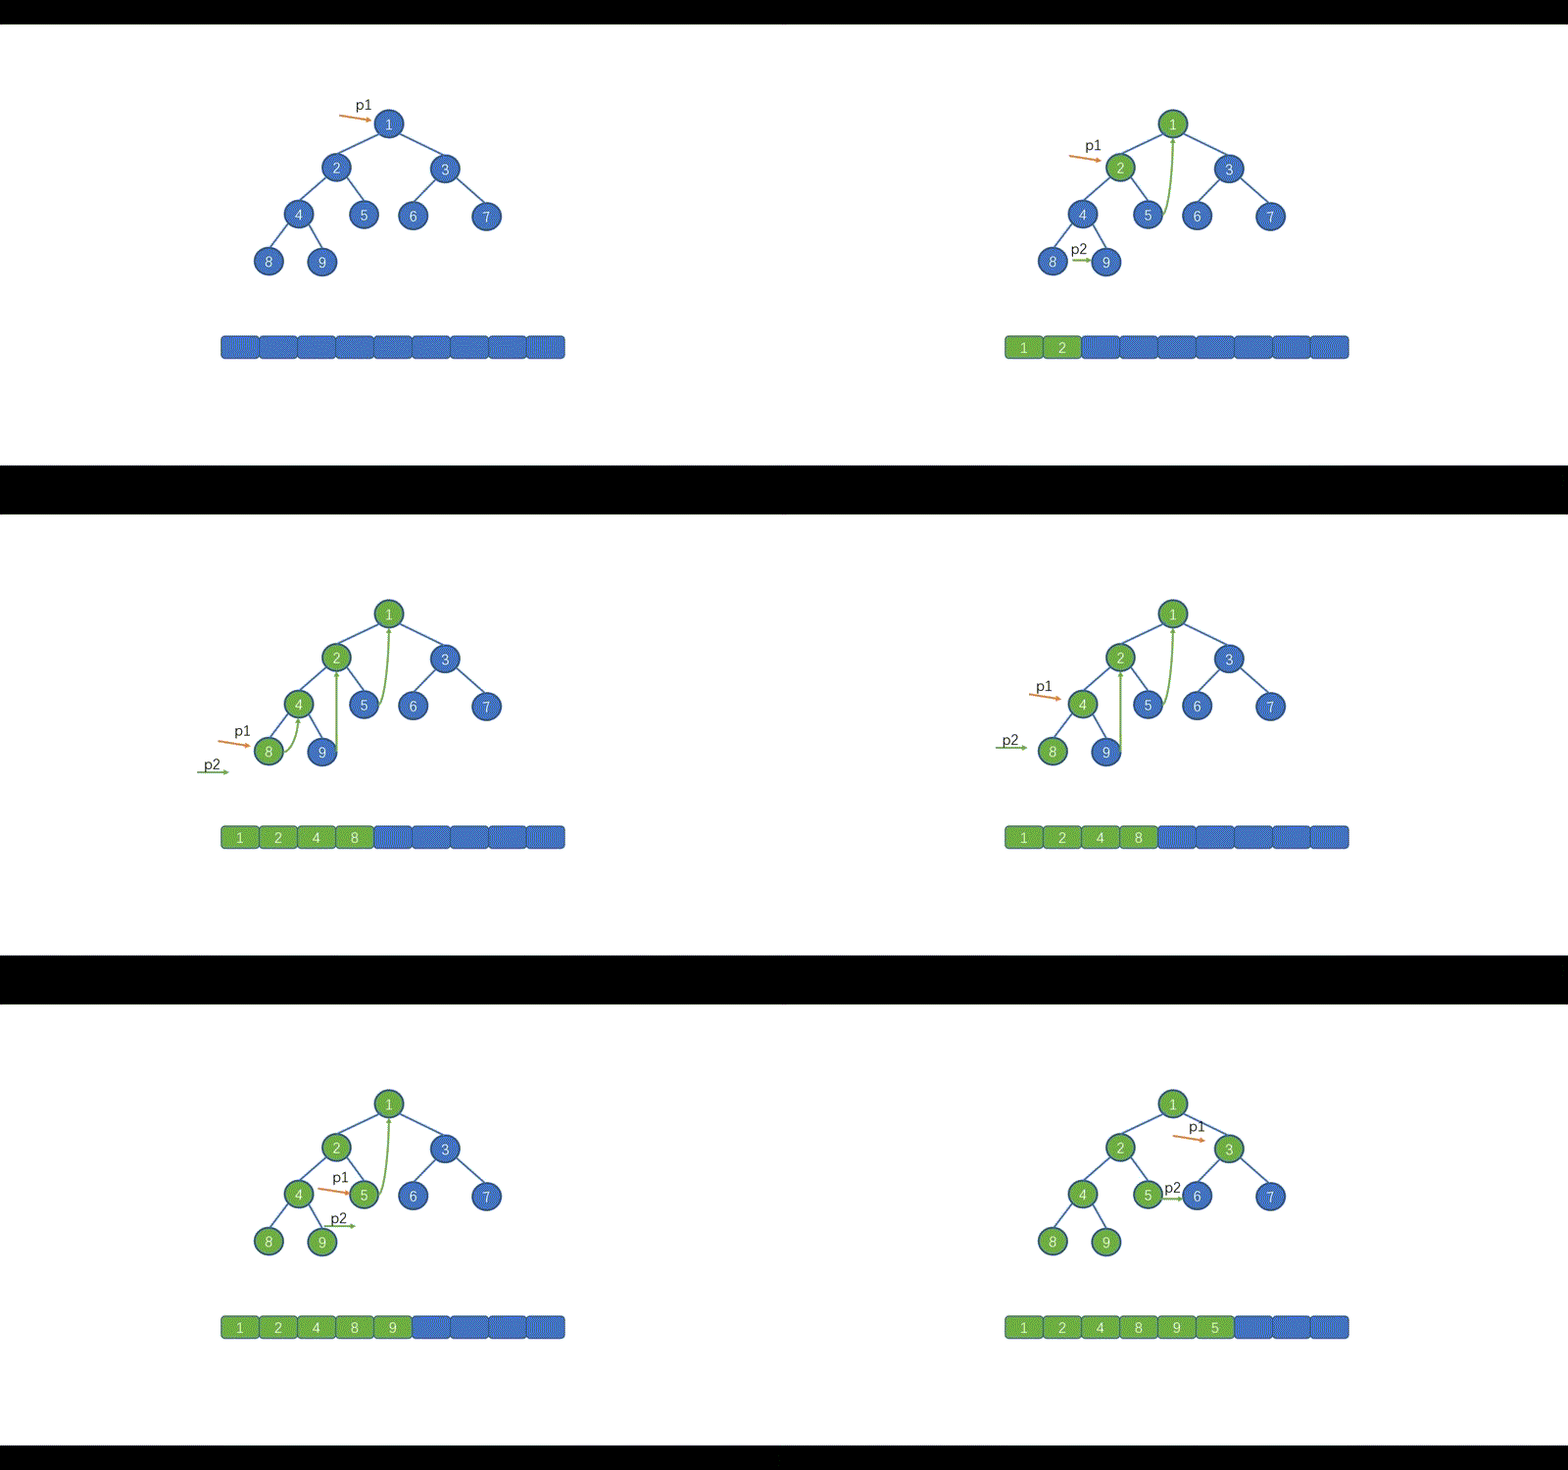
好啦,到这里我们就基本上就搞定了中序遍历的 Morris 方法,下面我们通过动画来加深一下印象吧,当然我也会把前序遍历的动画放在这里,大家可以看一下哪里有所不同。
参考代码:
//中序 Morris
class Solution {
    public List<Integer> inorderTraversal(TreeNode root) {
        List<Integer>  list = new ArrayList<Integer>();
        if (root == null) {
            return list;
        }
        TreeNode p1 = root;
        TreeNode p2 = null;
        while (p1 != null) {
            p2  = p1.left;
            if (p2 != null) {
                while (p2.right != null && p2.right != p1) {
                    p2 = p2.right;
                }
                if (p2.right == null) {
                    p2.right = p1;
                    p1 = p1.left;
                    continue;
                } else {
                    p2.right  = null;
                }
            }
            list.add(p1.val);
            p1 = p1.right;
        }
        return list;
    }
}
Swift Code:
class Solution {
    func inorderTraversal(_ root: TreeNode?) -> [Int] {
        var list:[Int] = []
        guard root != nil else {
            return list
        }
        var p1 = root, p2: TreeNode?
        while p1 != nil {
            p2 = p1!.left
            if p2 != nil {
                while p2!.right != nil && p2!.right !== p1 {
                    p2 = p2!.right
                }
                if p2!.right == nil {
                    p2!.right = p1
                    p1 = p1!.left
                    continue
                } else {
                    p2!.right = nil
                }
            }
            list.append(p1!.val)
            p1 = p1!.right
        }
        return list
    }
}


