-
Notifications
You must be signed in to change notification settings - Fork 139
Grid layout
This page explains how to setup the terminal layout using the grid package which organizes the layout into a grid of Rows and Columns. This is one of the two available methods, see also the Binary tree layout.
Grid organizes the terminal terminal into Rows and Columns. Grid accepts Element An Element is one of the following:
- A horizontal Row.
- A vertical Column.
- A widget, see Widget API.
The grid package defines a Builder object which provides the options required to split the container into a grid layout. See the Binary tree layout for more details about splitting containers.
The grid package allows any combination of Rows and Columns, the following diagram demonstrates how this can be used to create a layout.

A container can either be split vertically or horizontally.
The container.SplitHorizontal option splits the current container into two sub-containers:
- Left sub-container, use container.Left to specify its options.
- Right sub-container, use container.Right to specify its options.
The container.SplitVertical option splits the current container into two sub-containers:
- Top sub-container, use container.Top to specify its options.
- Bottom sub-container, use container.Bottom to specify its options.
The container.SplitPercent option is used to specify at what percentage to perform the split. I.e. the percentage of the containers width (when splitting vertically) or height (when splitting horizontally).
The default value of the split is defined as a package constant.
The container.New function is used to constract a container. The API of this function uses a recursive builder patters, the complete layout of all the containers in the tree is established in a single call.
To create the terminal layout indicated in the diagram above, the developer can use the following call:
tb, err := termbox.New()
if err != nil {
  return fmt.Errorf("termbox.New => %v", err)
}

if _, err := container.New(
    tb,
    container.SplitVertical(
        container.Left(
            container.Border(linestyle.Light),
        ),
        container.Right(
            container.SplitHorizontal(
                container.Top(
                    container.Border(linestyle.Light),
                ),
                container.Bottom(
                    container.SplitVertical(
                        container.Left(
                            container.Border(linestyle.Light),
                        ),
                        container.Right(
                            container.Border(linestyle.Light),
                        ),
                    ),
                ),
            ),
        ),
    ),
); err != nil {
    return fmt.Errorf("container.New => %v", err)
}
When executed, this results in the following terminal layout:

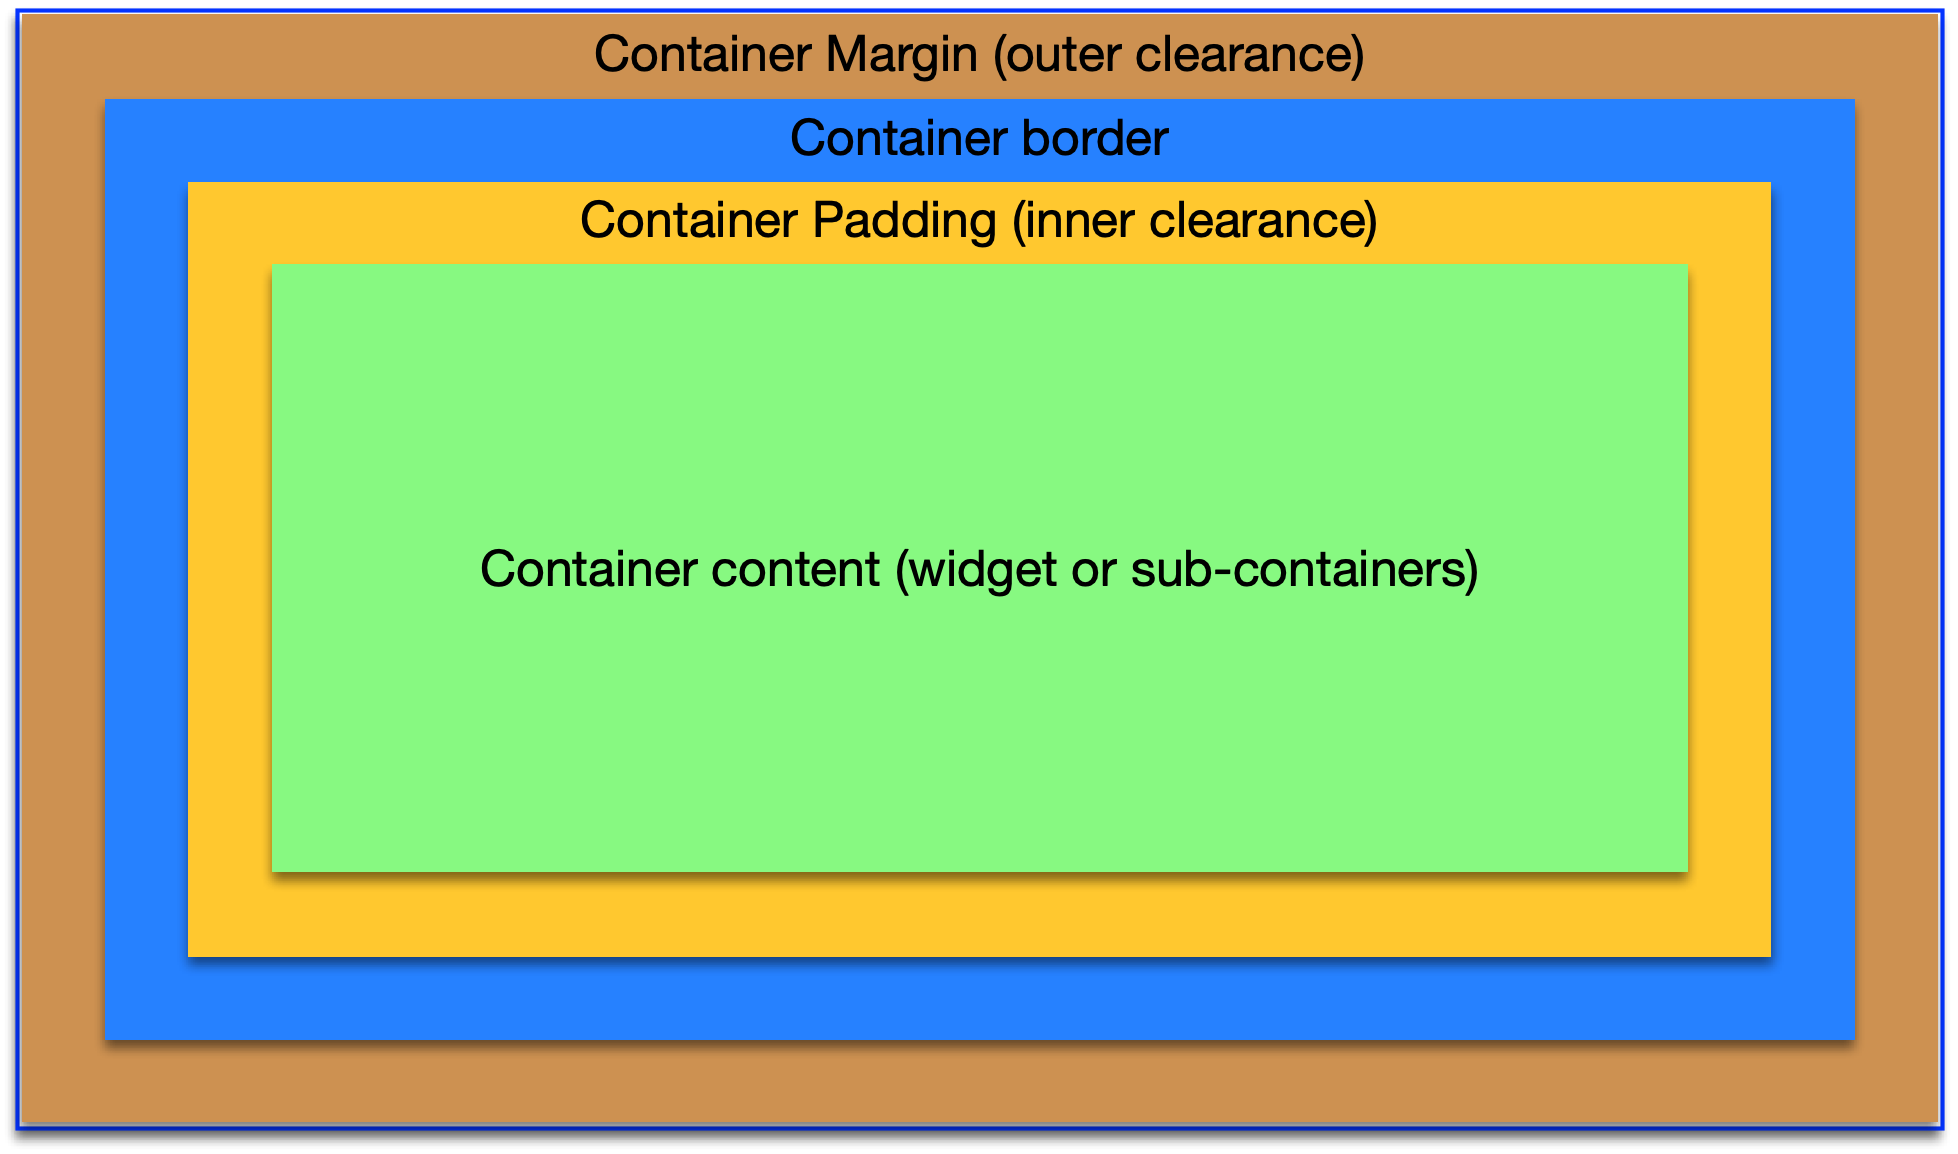
The terminal layout can be further adjusted by configuring margin and padding of containers. A margin is a cleared space on the outside of the container, i.e. between its border and whats beyond it. A padding is a cleared space on the inside of the container, i.e. between its border and its content.
The following diagram gives a visual explanation of where margin and padding apply:

The margin or padding can be applied to a container by specifying absolute or relative values.
Absolute margin or padding is specified as the amount of cells that should be cleared. When specifying absolute values, the padding remains unchanged even if the terminal and container size changes.
Use one of the following options to specify absolute margin:
Use one of the following options to specify absolute padding:
Relative margin or padding is specified as a percentage of the container's size. Specifying relative values is useful to accommodate terminal and container size changes. When the terminal size changes, so does the padding or margin.
Use one of the following options to specify relative margin. The top and bottom values are specified as percentage of the container's height.
The right and left values are specified as percentage of the container's width.
Use one of the following options to specify relative padding. The top and bottom values are specified as percentage of the container's height.
The right and left values are specified as percentage of the container's width.
The following code snippet demonstrates application and effect of margin and padding. The left container has both margin and padding applied. The right container has none of these options. Both containers contain a single button and have a border.
t, err := termbox.New()
if err != nil {
    return fmt.Errorf("termbox.New => %v", err)
}
defer t.Close()

addB, err := button.New("(a)dd", func() error {
    return nil
})
if err != nil {
    return fmt.Errorf("button.New => %v", err)
}

subB, err := button.New("(s)ubtract", func() error {
    return nil
})
if err != nil {
    return fmt.Errorf("button.New => %v", err)
}

c, err := container.New(
    t,
    container.Border(linestyle.Light),
    container.SplitHorizontal(
        container.Top(),
        container.Bottom(
            container.SplitVertical(
                container.Left(
                    container.PlaceWidget(addB),
                    container.AlignHorizontal(align.HorizontalRight),
                    container.Border(linestyle.Light),
                    container.MarginBottom(3),
                    container.MarginRight(1),
                    container.PaddingRight(3),
                ),
                container.Right(
                    container.PlaceWidget(subB),
                    container.AlignHorizontal(align.HorizontalLeft),
                    container.Border(linestyle.Light),
                ),
            ),
        ),
        container.SplitPercent(60),
    ),
)
if err != nil {
    return fmt.Errorf("container.New => %v", err)
}
The code above results in the following layout:

See a typo, something missing or outright wrong? Feel free to edit the Wiki pages directly, alternatively talk to us.

